|
Section |
Summary |
| POS Device Configurations |
Device types and applications for POS System |
| Logging in/out of the POS |
How to log in and out of the POS system |
| Changing the Revenue Center |
Steps to select or change the revenue center in POS |
| Connect Card Reader Payment |
Instructions to connect a card reader for payments |
| Connecting Customer Monitor (DS POS) |
How to set up a customer-facing display monitor |
| Basic Quick Order Checkout |
Processing quick orders through POS |
| Split Payment Quick Order Checkout |
Enable and check out a quick order with multiple payments |
| Basic Open Item Checkout |
Enable and add a basic open item to cart |
| Detailed Open Item Checkout |
Apply details to an open on the POS device to checkout |
| Refunding Orders from POS Device |
How to process refunds directly from POS |
| Sending Receipts from POS |
Send customer receipts from the POS |
POS Device Configurations
Dual Screen POS (DS) consists of 2 devices that operate in coordination with one another for a seamless transaction. A salesperson creates an order on one device, and the customer fulfills payment on the other.
-
DS utilizes two applications to operate: Bartender (.gnr version) and Customer applications. These applications are developed, released, and intended to be used together.
-
The devices are connected to one another via Bluetooth connection. Devices must be paired via Bluetooth to operate the Bartender and Customer application together.
Single Screen POS (SS) consists of 1 device base that is used to carry out both order and payment fulfillment
-
SS devices only utilize the Bartender (.gnr version) application for all POS operations
Hand Held POS (HH) consists of 1 mobile device base that is used to carry out both order and payment fulfillment with the added benefit of an extended internal battery life and physical mobility for all types of event operations
-
HH devices only utilize the Bartender (.lite version) to operate for all POS operations
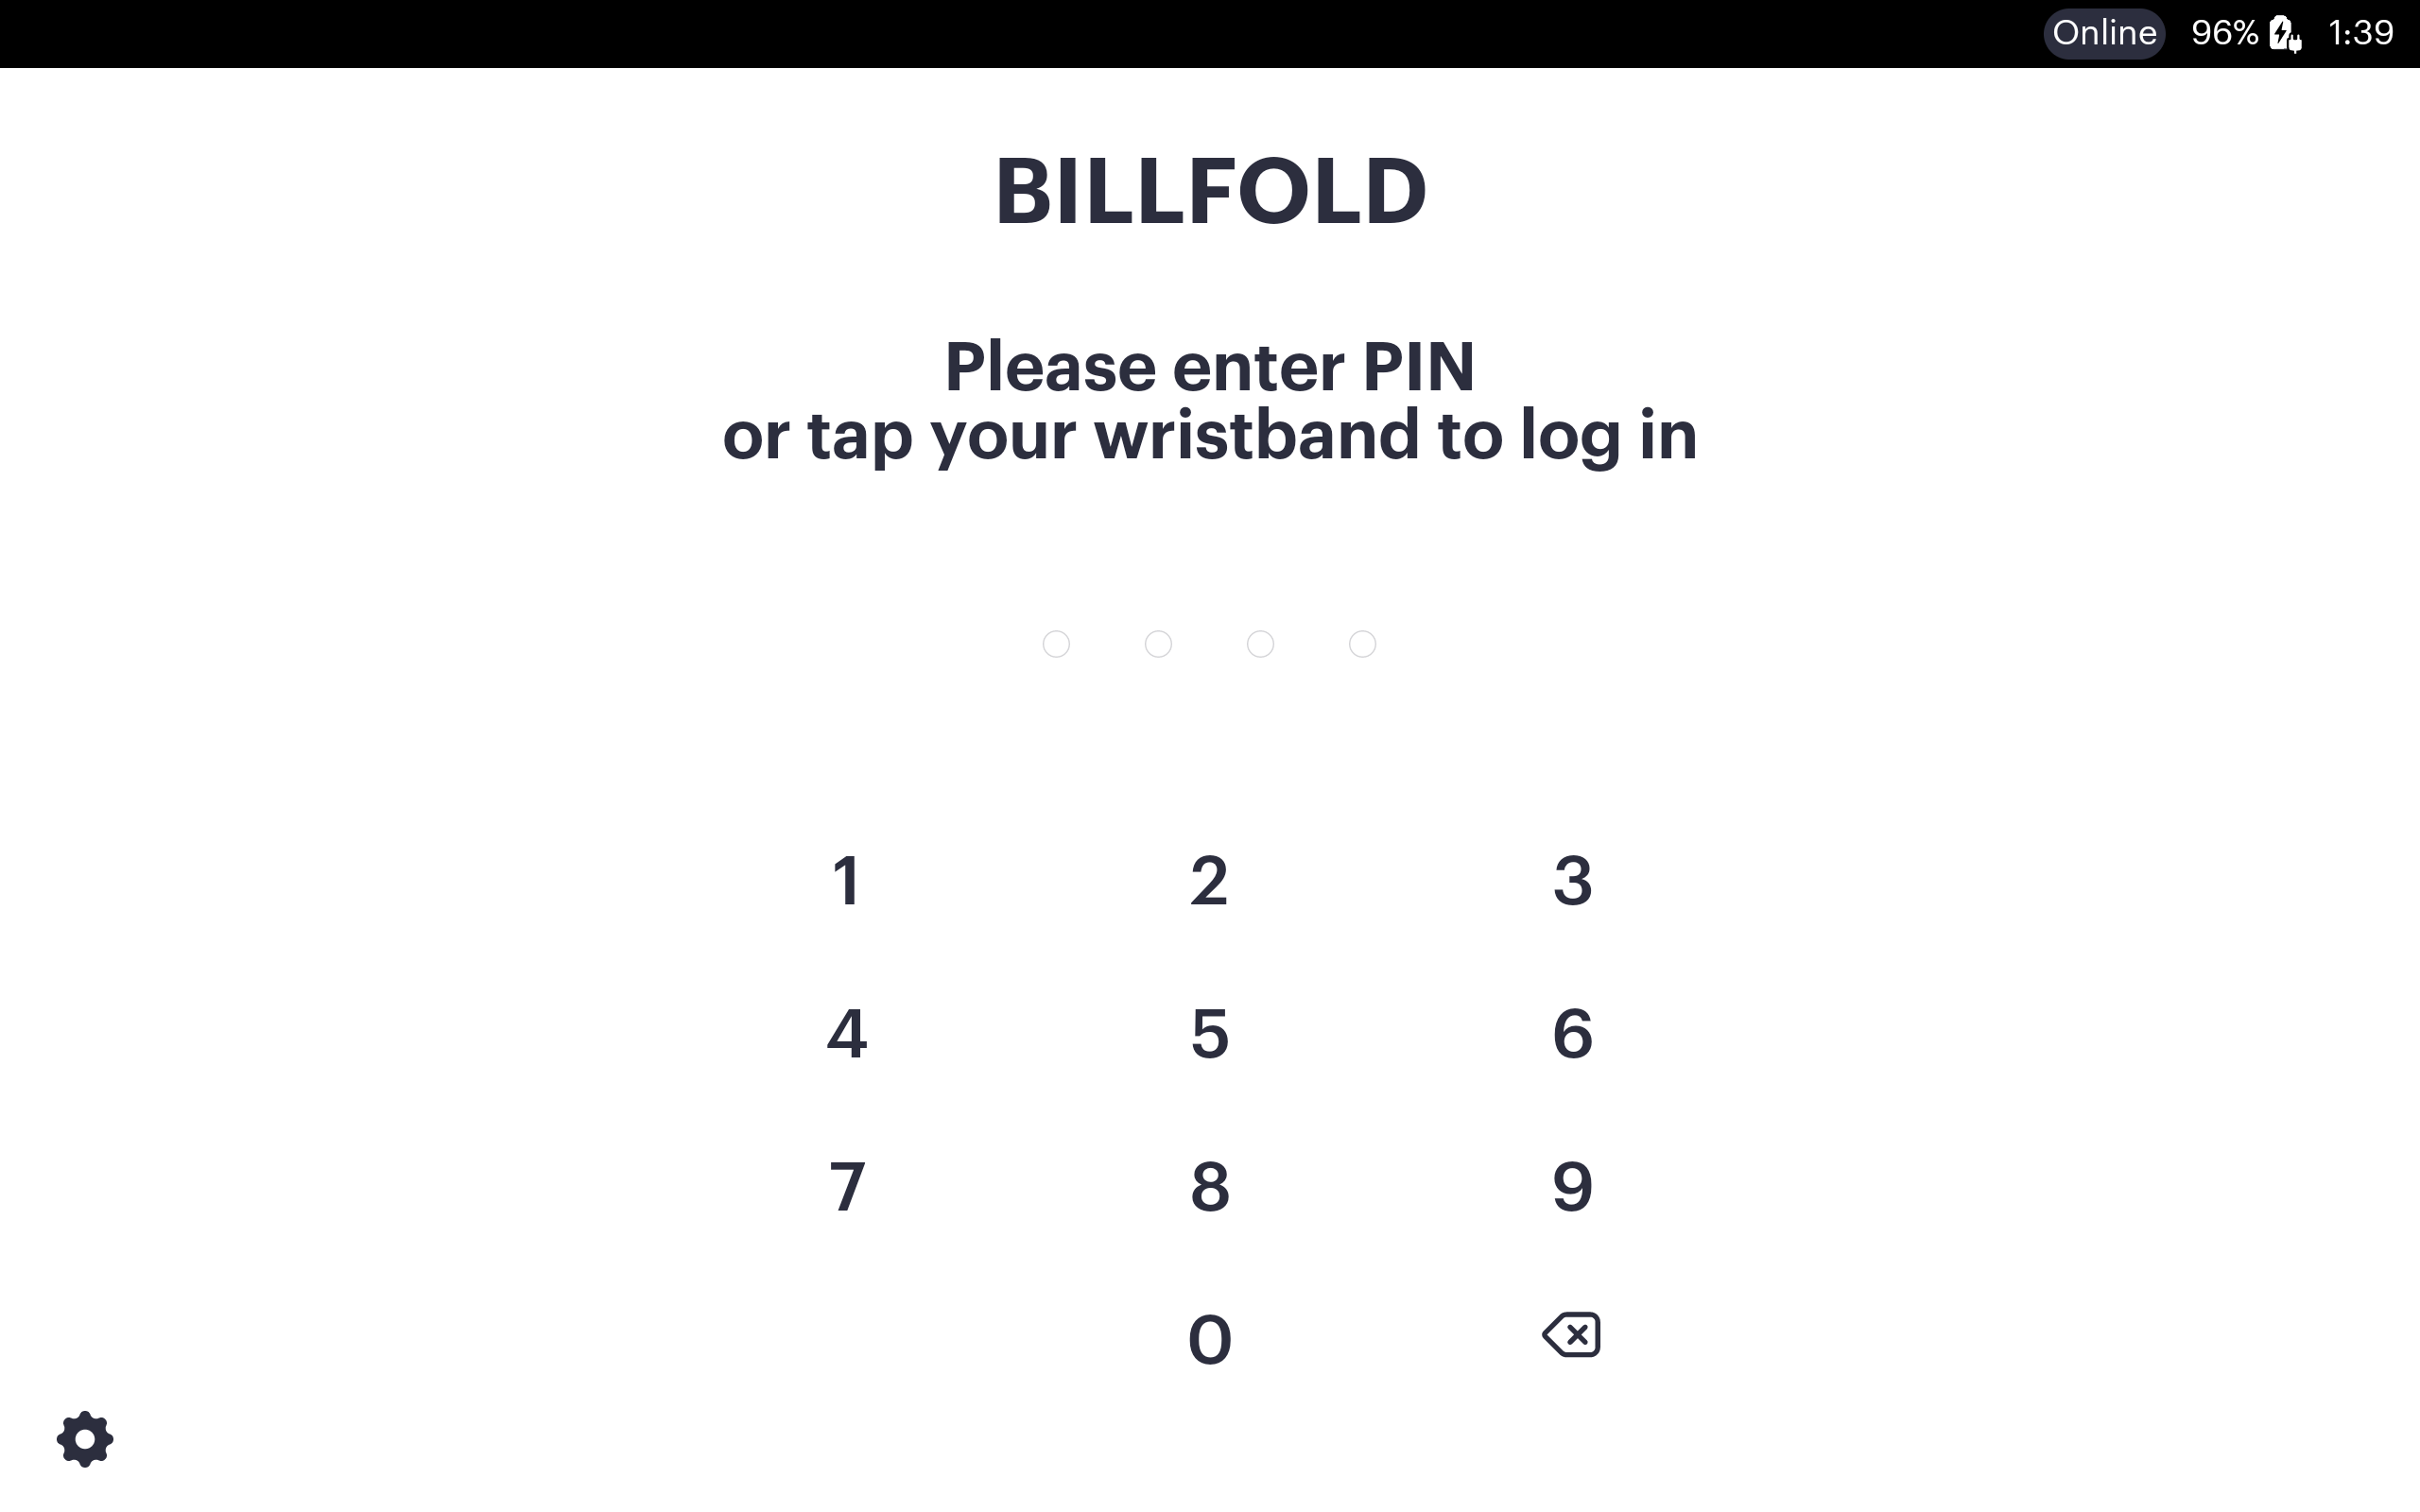
Logging in/out of the POS
-
Open the Bartender application from the device's home screen
-
License device if necessary
-
Input the employee PIN to log in
-
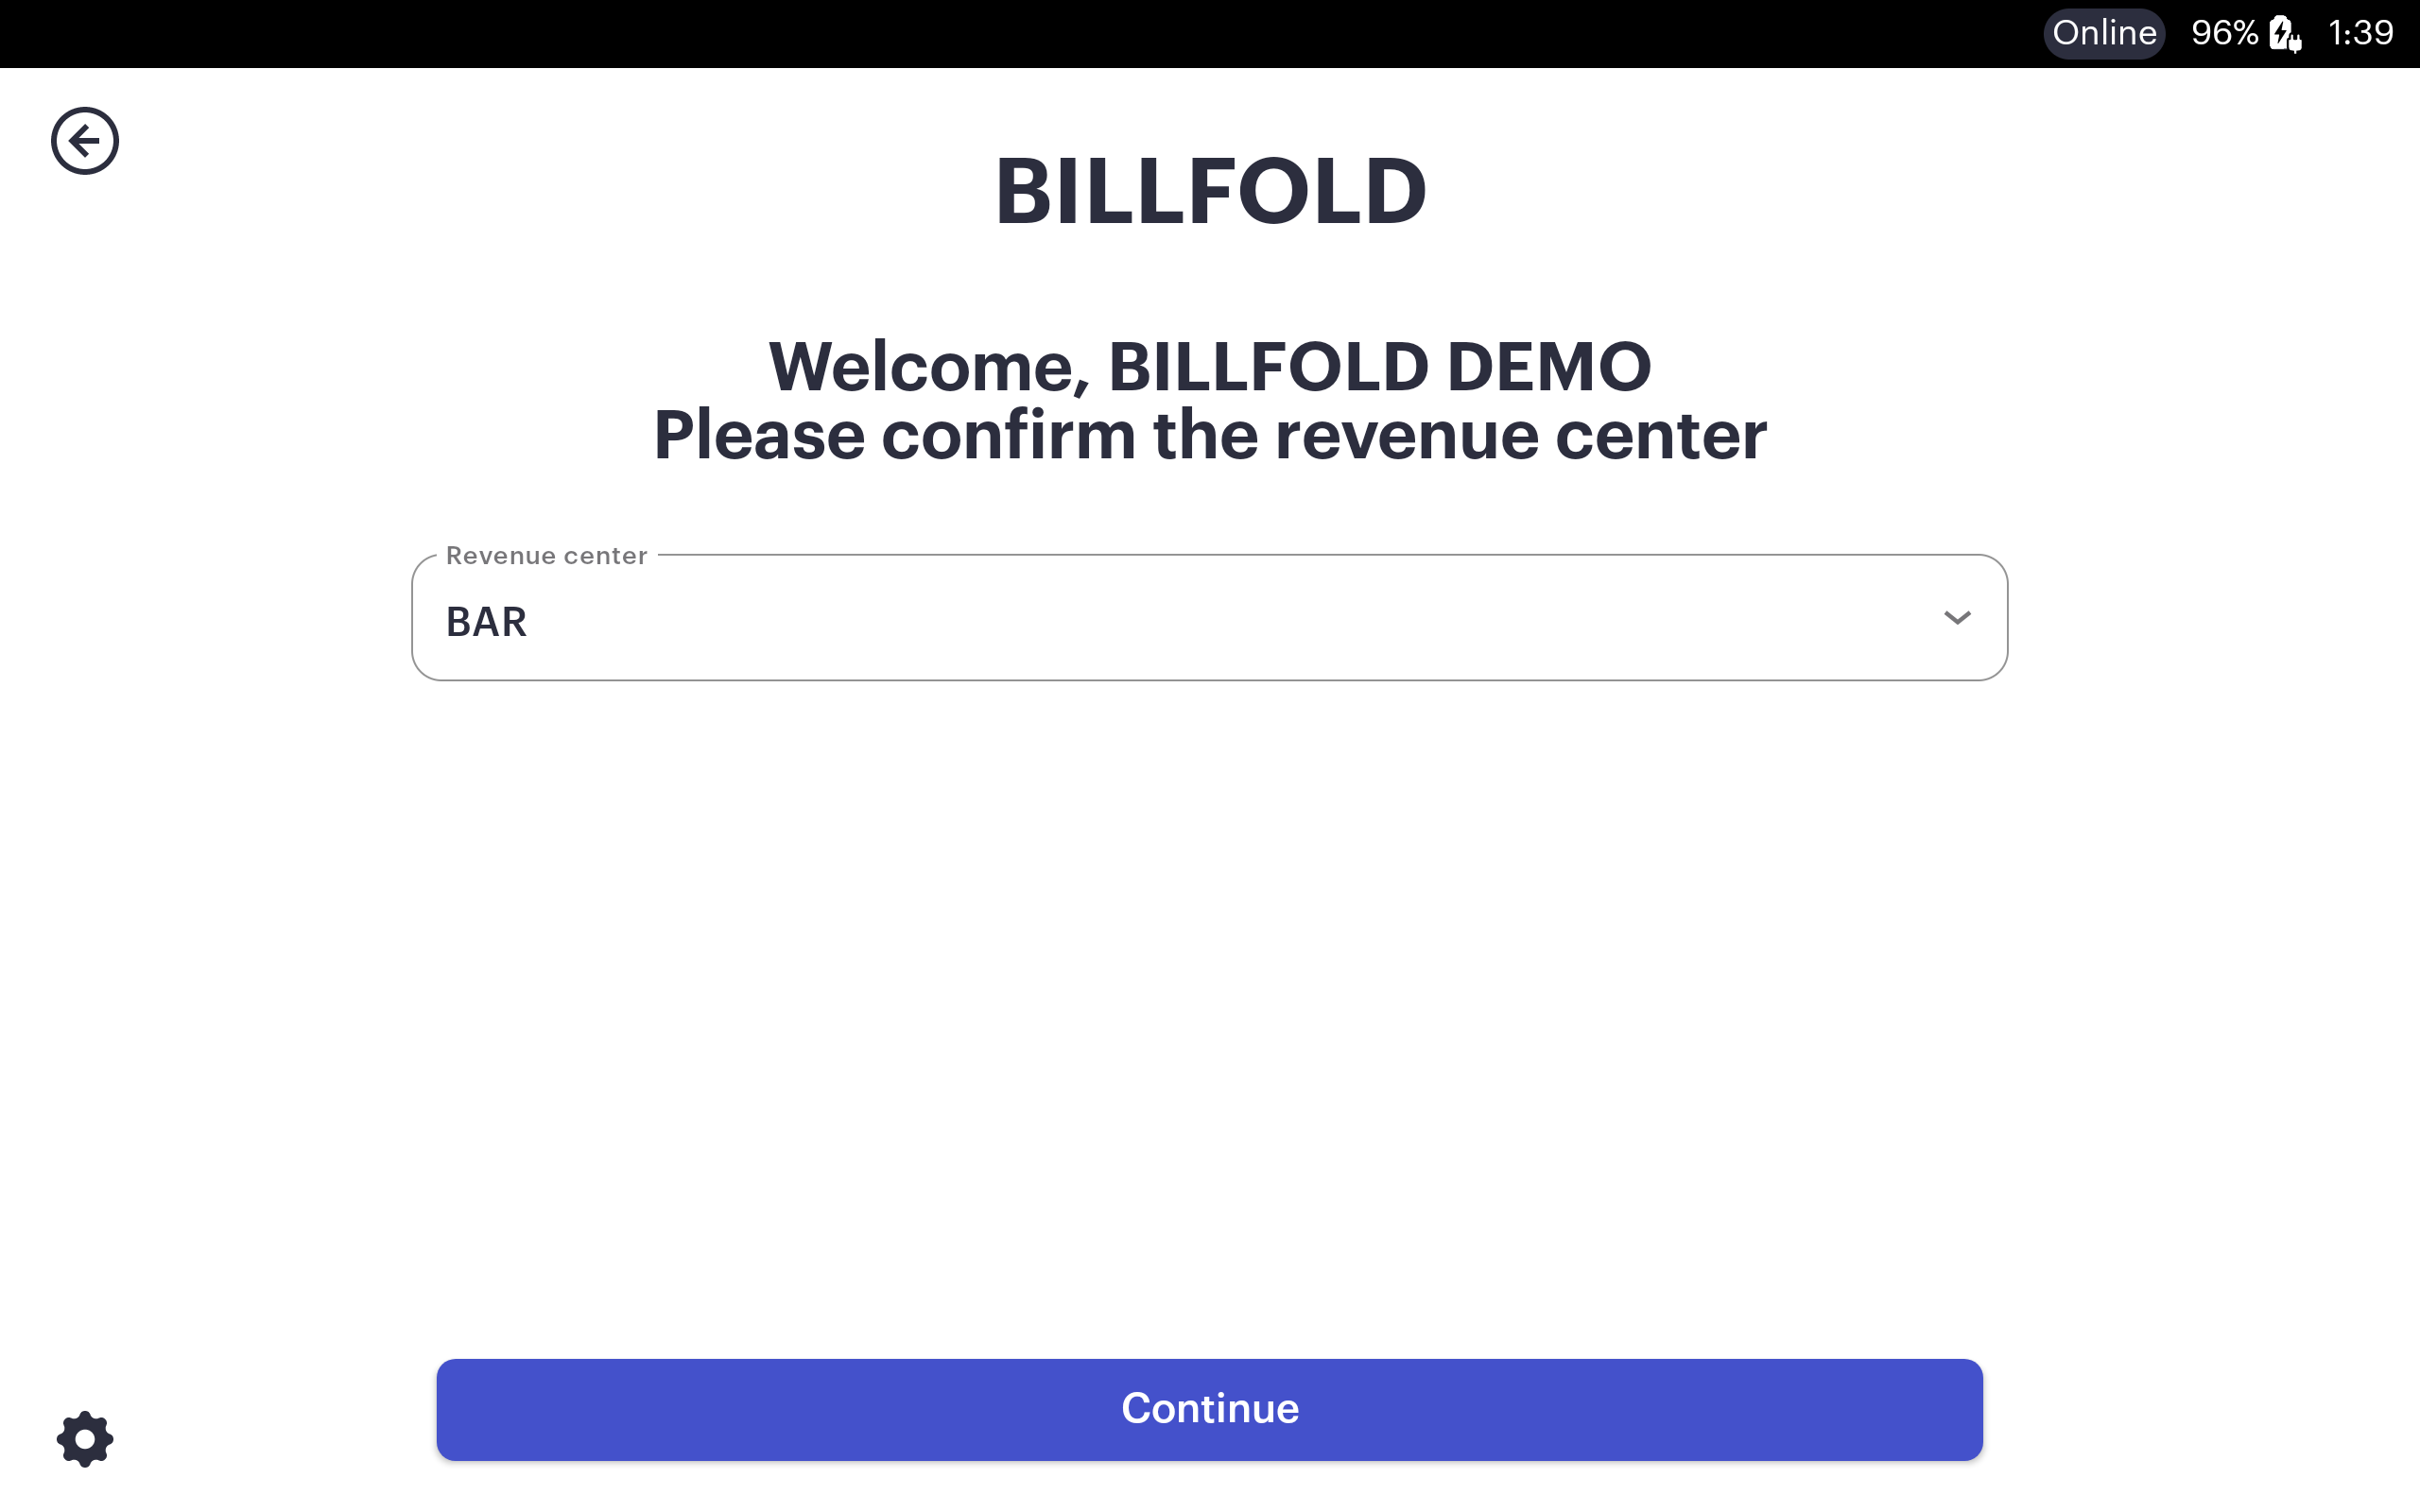
Confirm the operating Revenue Center to complete logging in
-
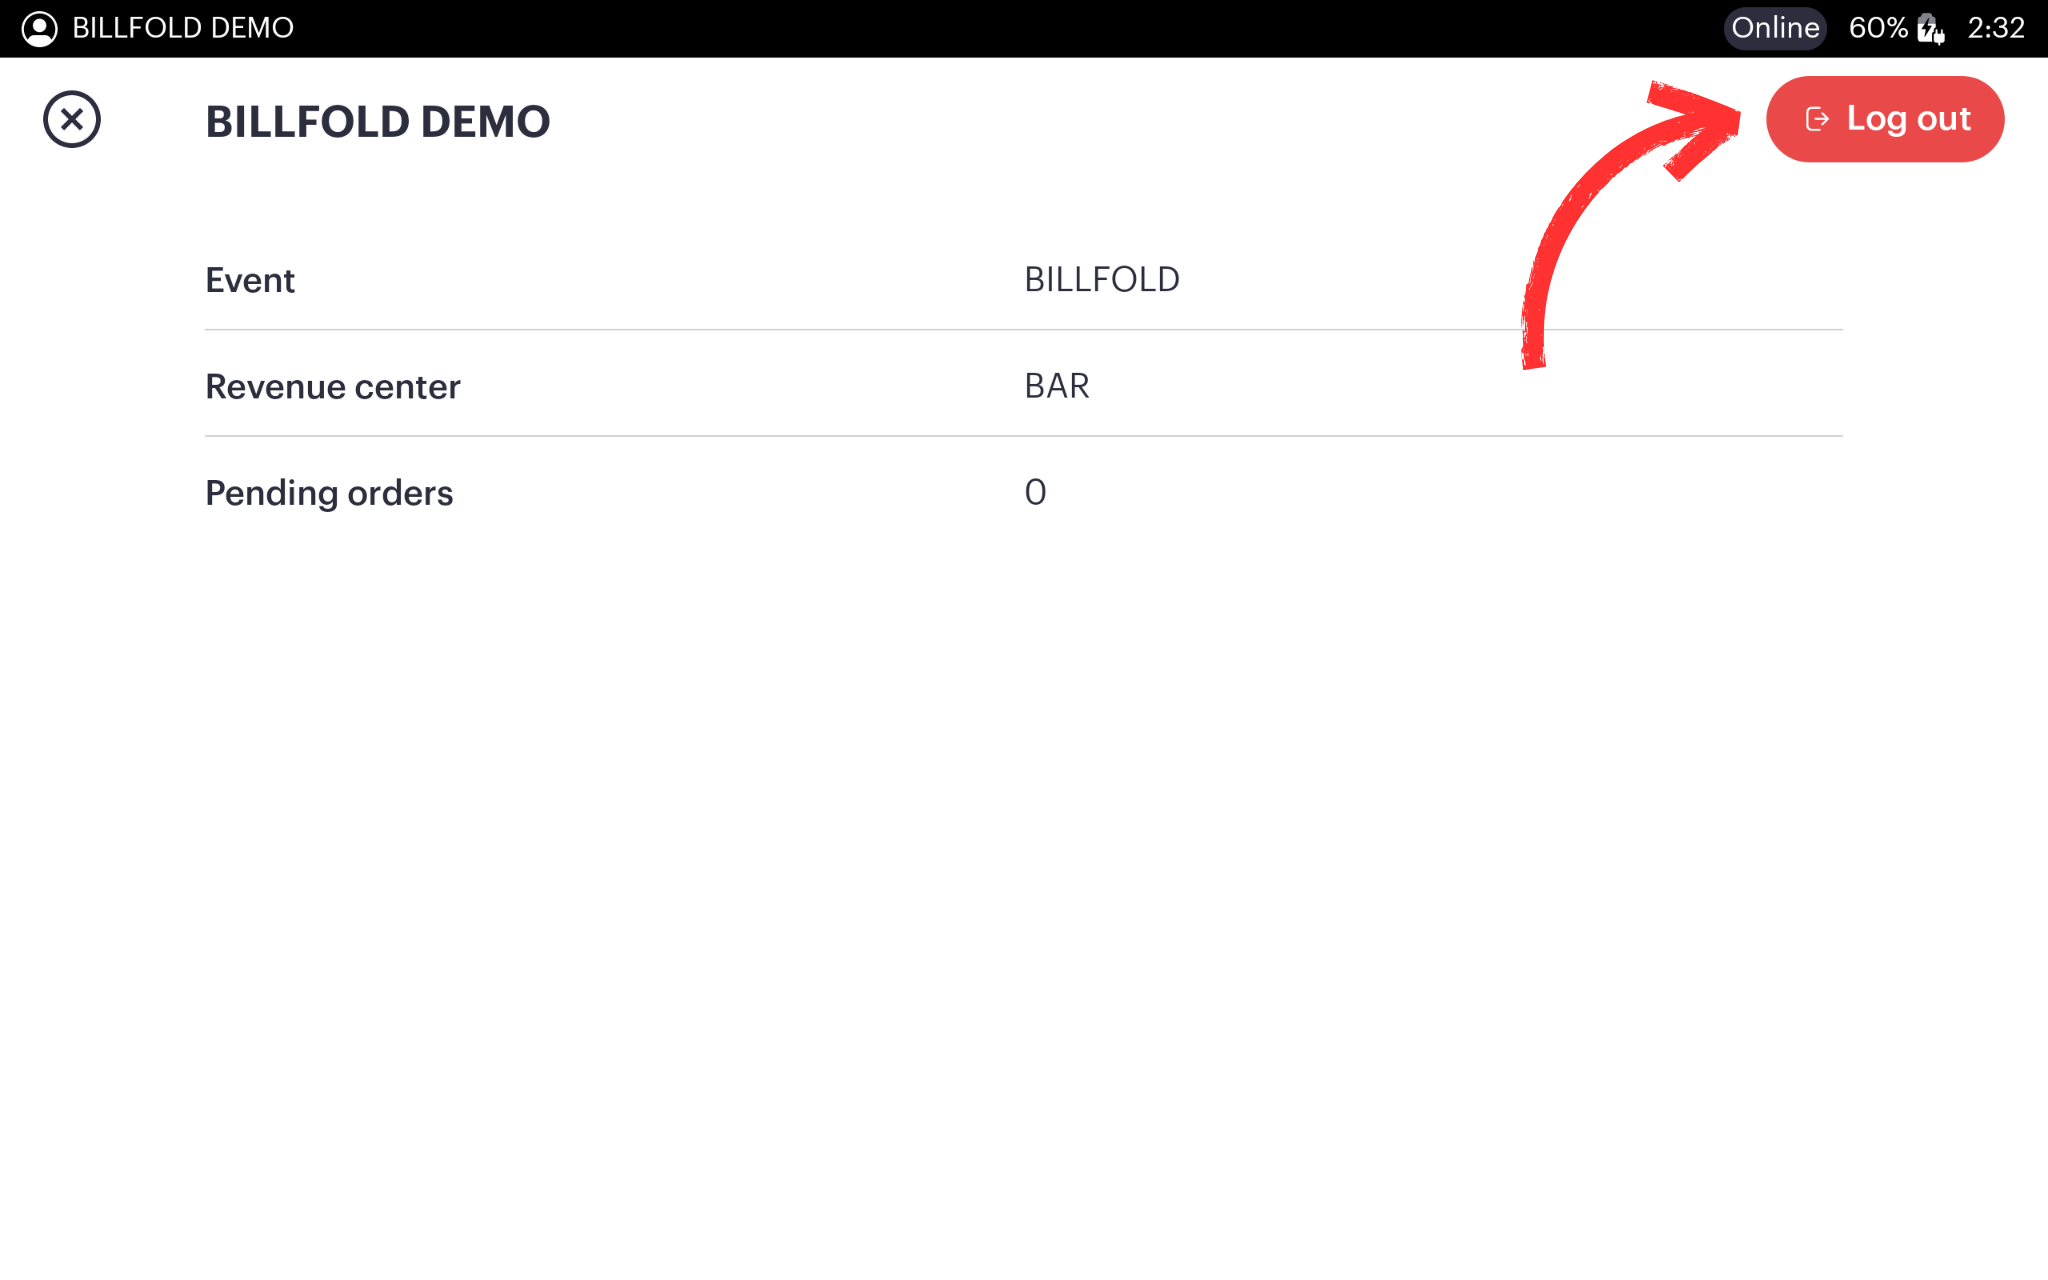
From anywhere within the Bartender app, select the employee name on the screen, then select the “log out” button.
Changing the Revenue Center
-
Tap the settings icon in the bottom left corner of the screen (top right if using HH POS)
-
Tap the revenue center drop-down from the right side of the screen (top middle of the screen if using HH POS) - Not all employees may have access to change revenue centers; check permissions if they're not able to.
-
Select the correct revenue Center from the drop picklist
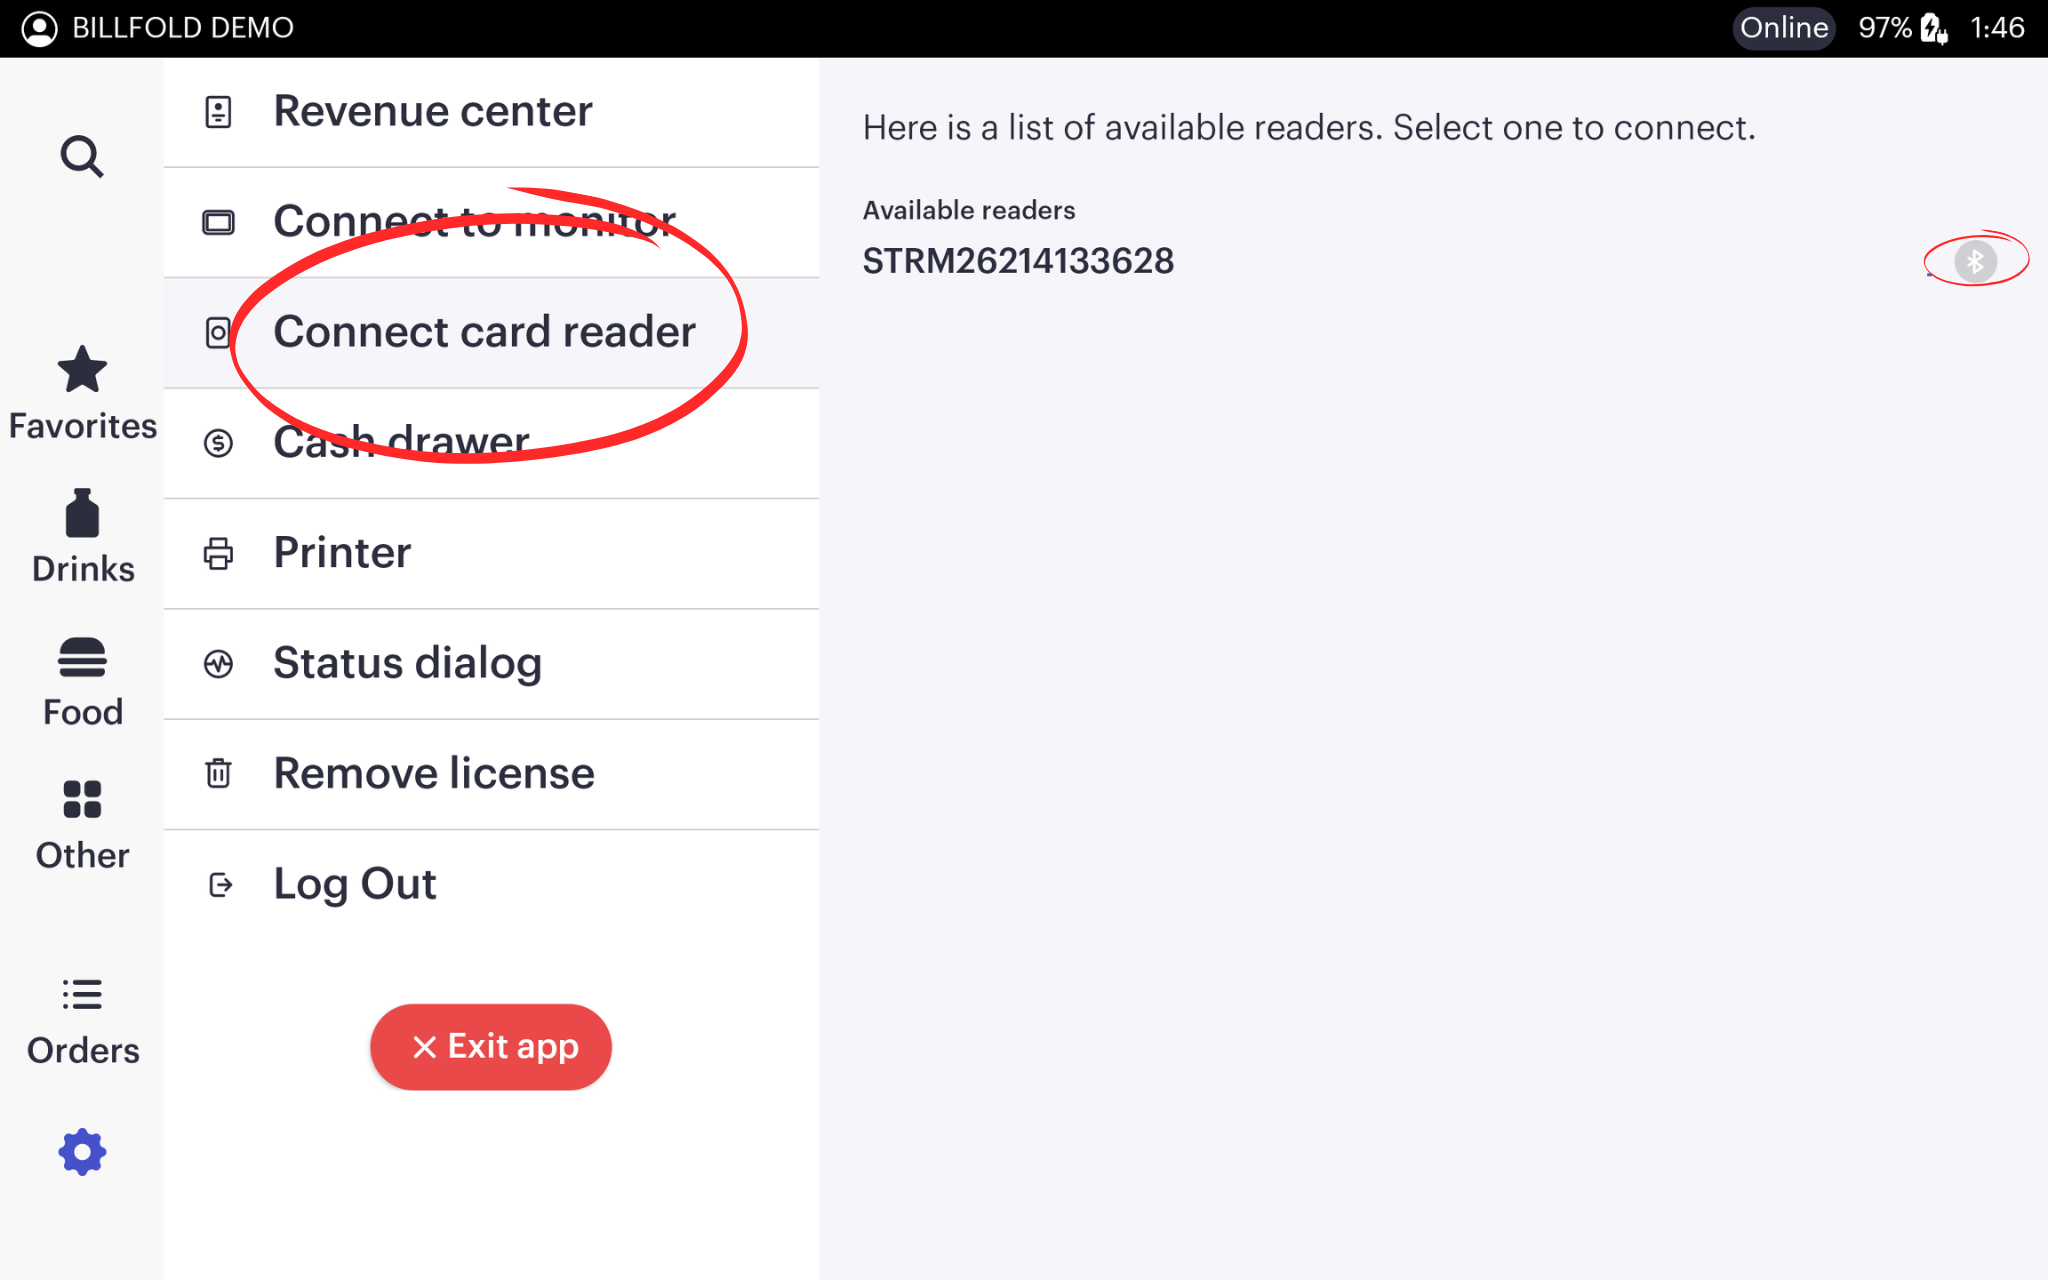
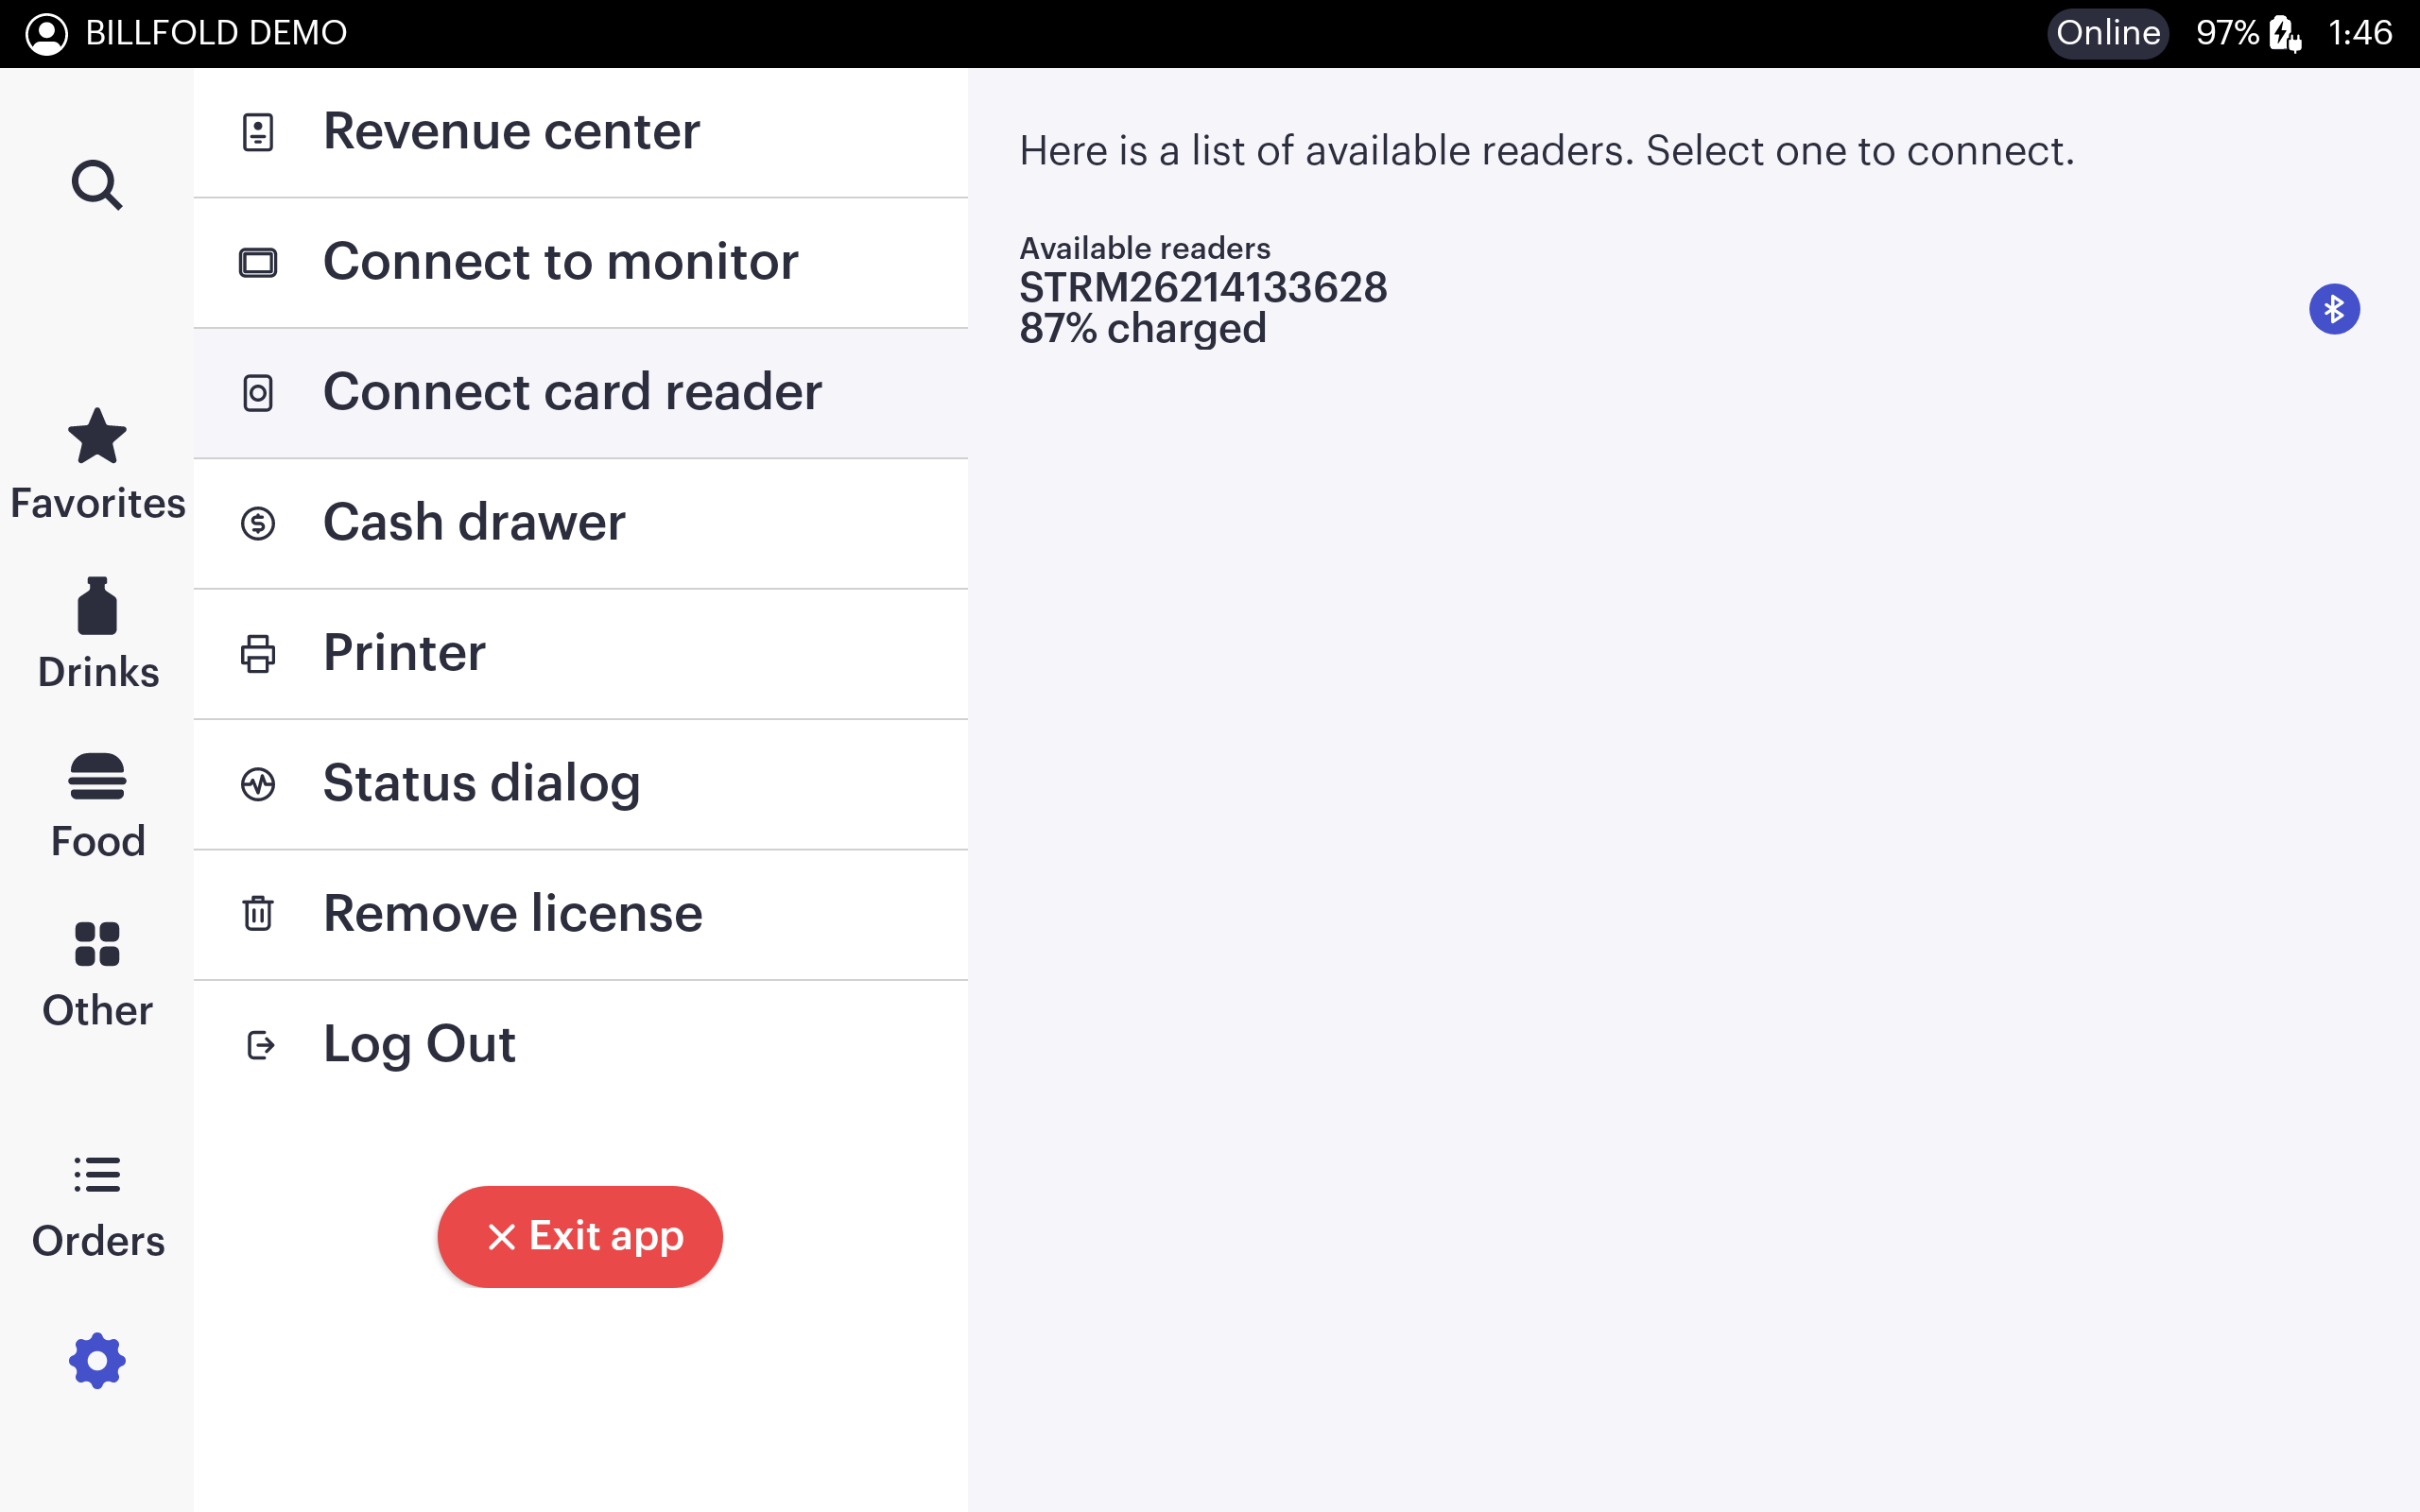
Connect Card Reader Payment
-
From the application settings, select “connect card reader” to enter discovery mode
-
Then tap the Bluetooth icon to the right of the desired reader from the list of available devices
-
If you don’t see the desired card reader, tap the power button on the bottom of the card reader to ensure that it is on, and then tap “connect card reader” again to refresh device discovery
-
When the card reader has been successfully connected, the Bluetooth icon will turn blue and report card reader battery status
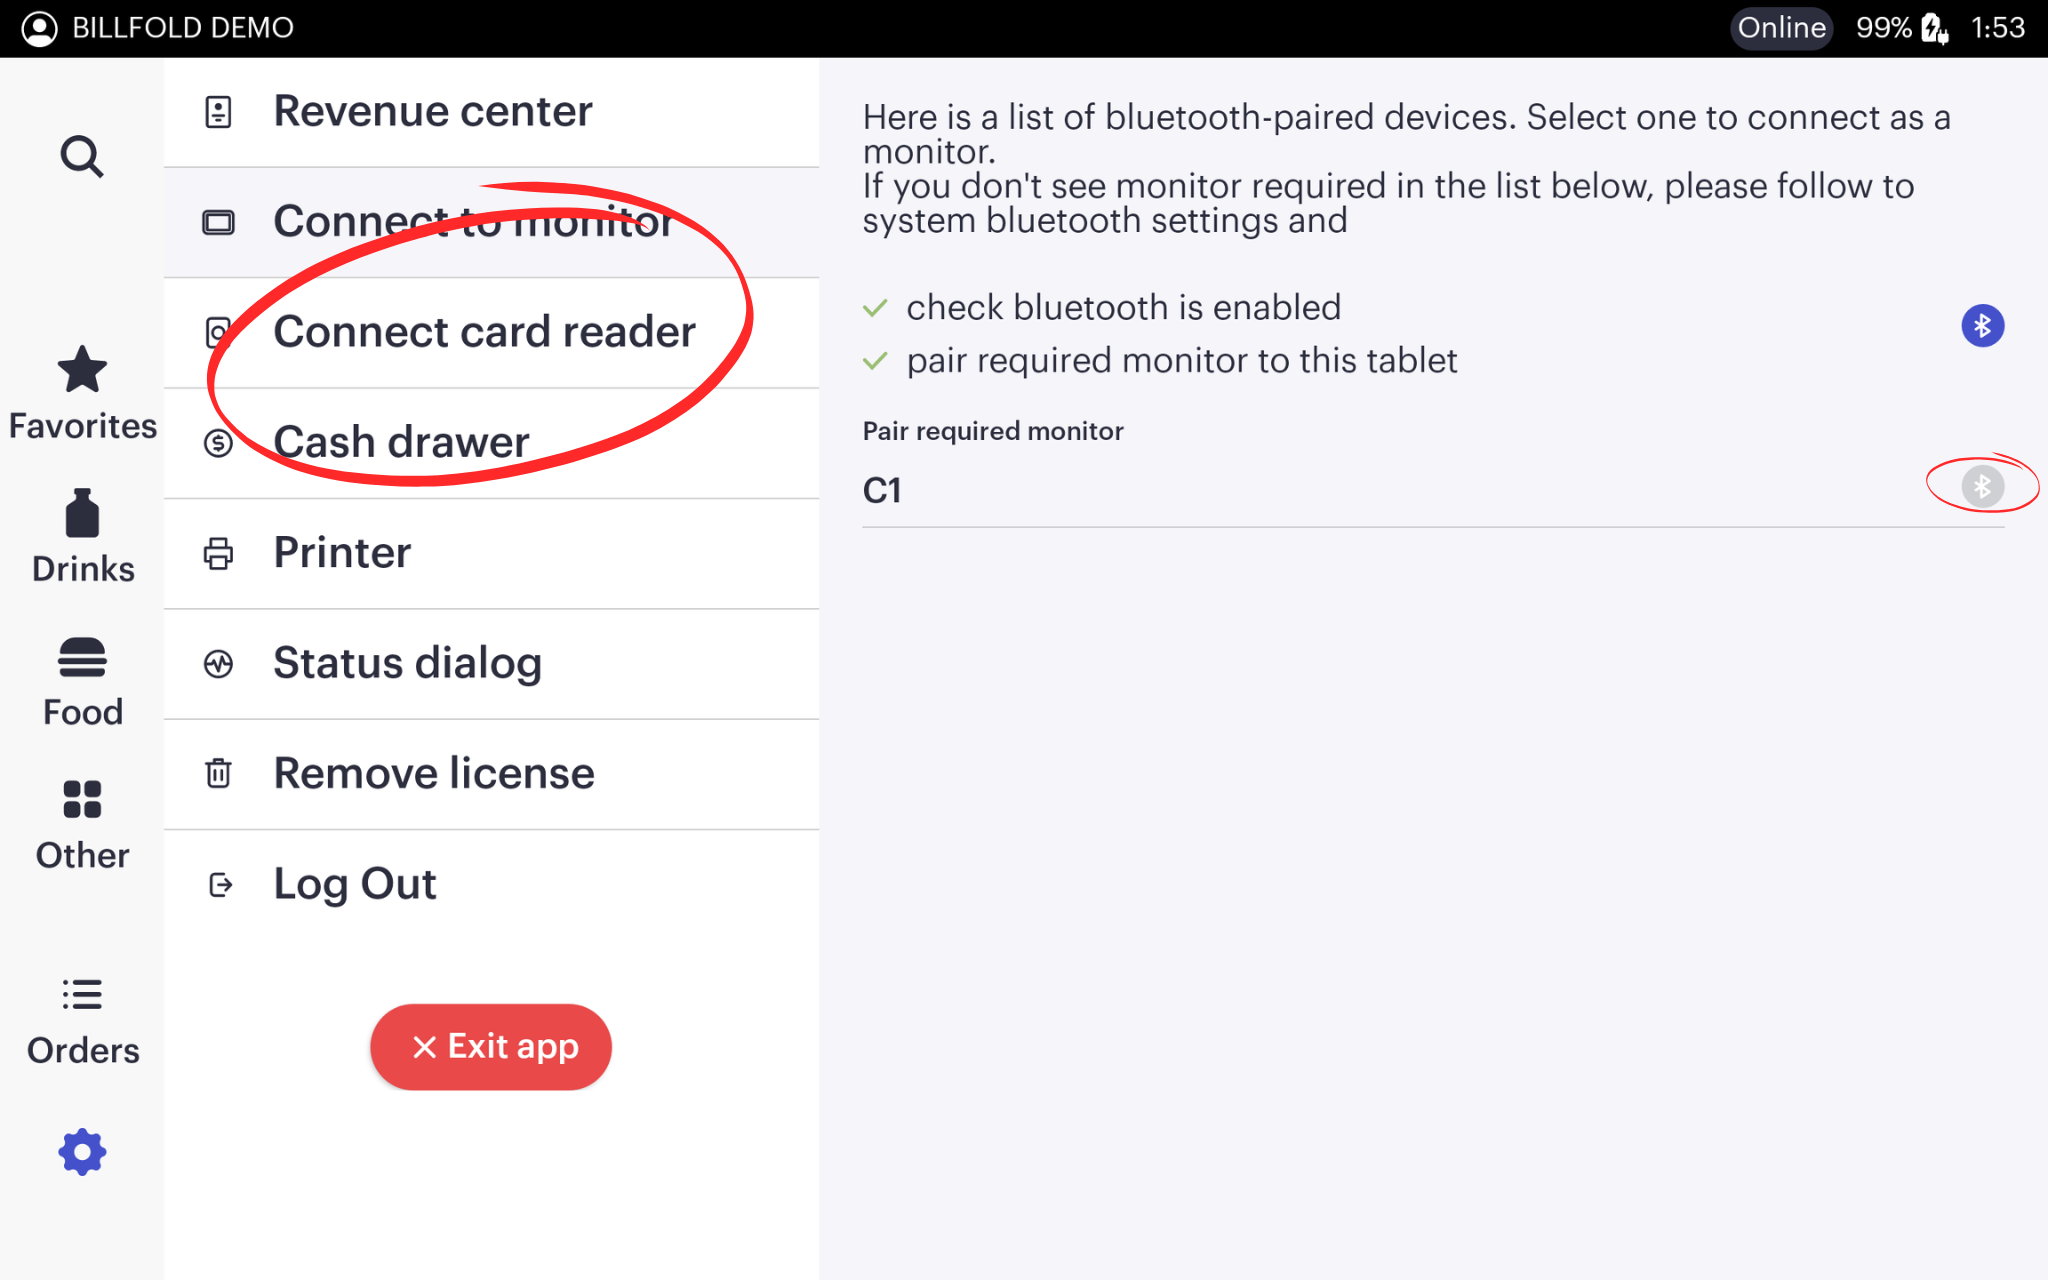
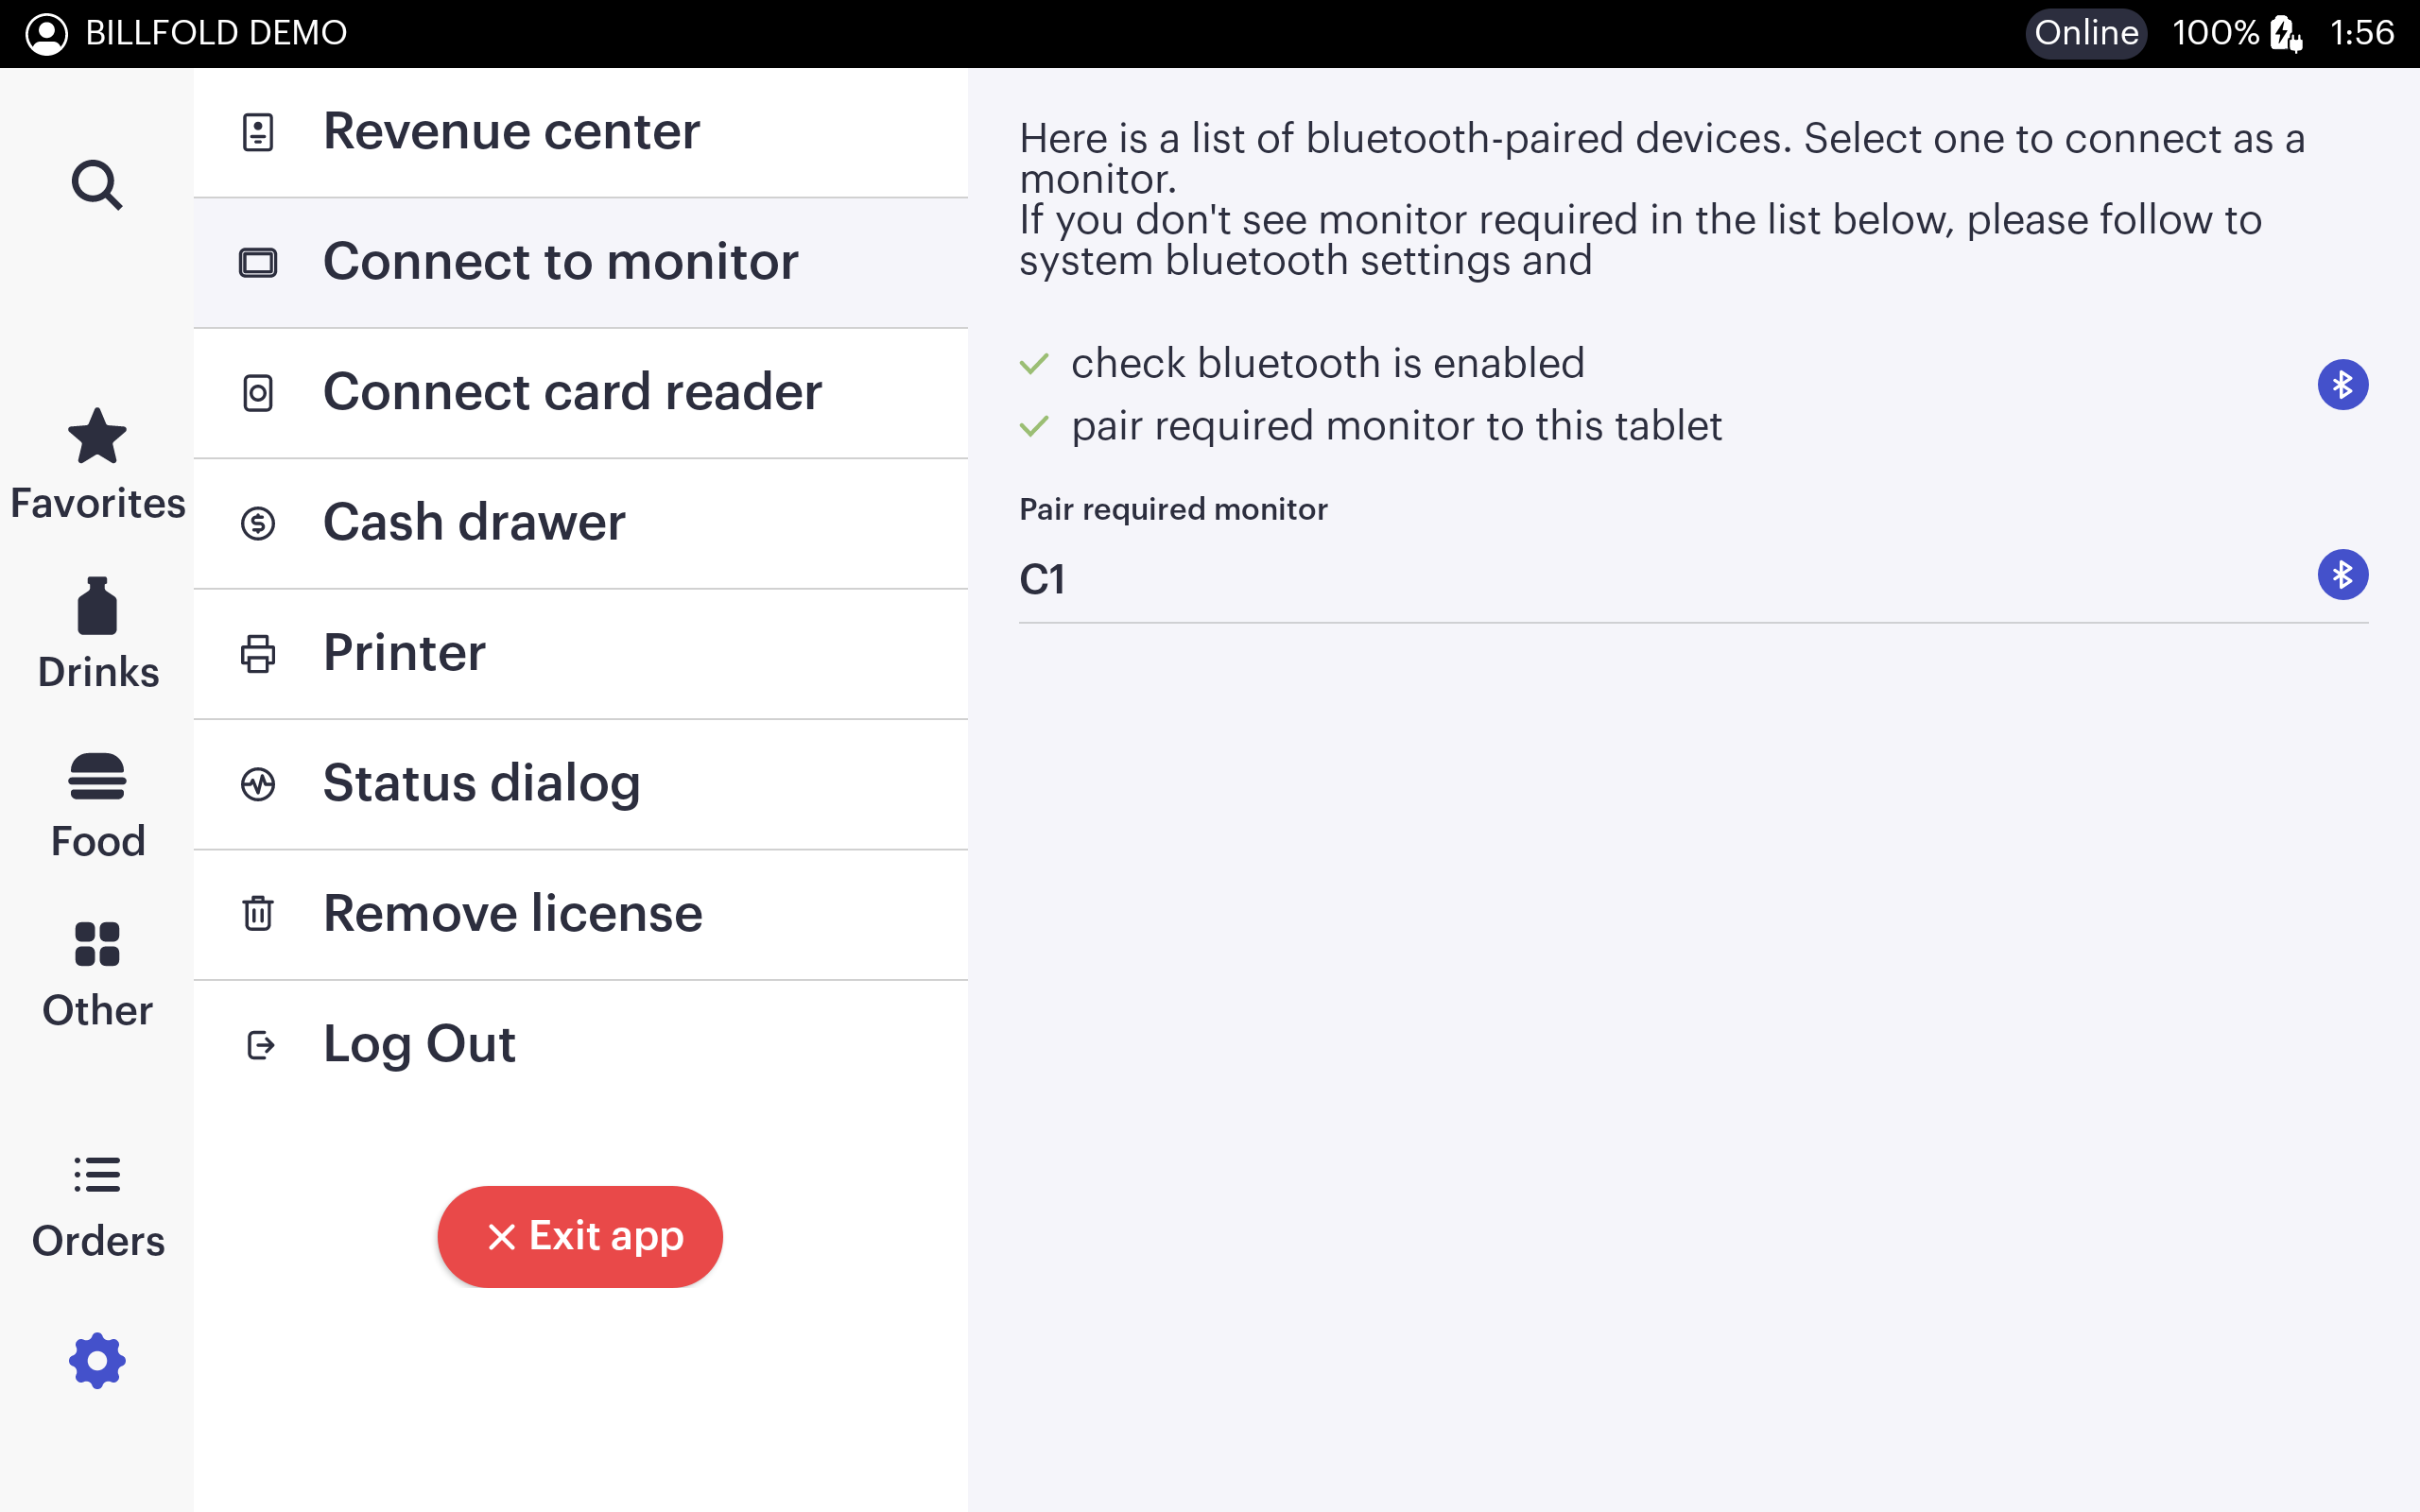
Connecting Customer Monitor (DS POS)
-
From the application settings, tap “connect to monitor” to see a list of paired devices that can be used as a monitor
Note: devices MUST be paired in the Android OS settings in order to be found within the app -
Tap the grey Bluetooth icon to the right of the desired device
-
Once connected, the connected device operating operating Customer application will load any event presentations and the customer order view. Tap anywhere to exit this setting

Basic Quick Order Checkout
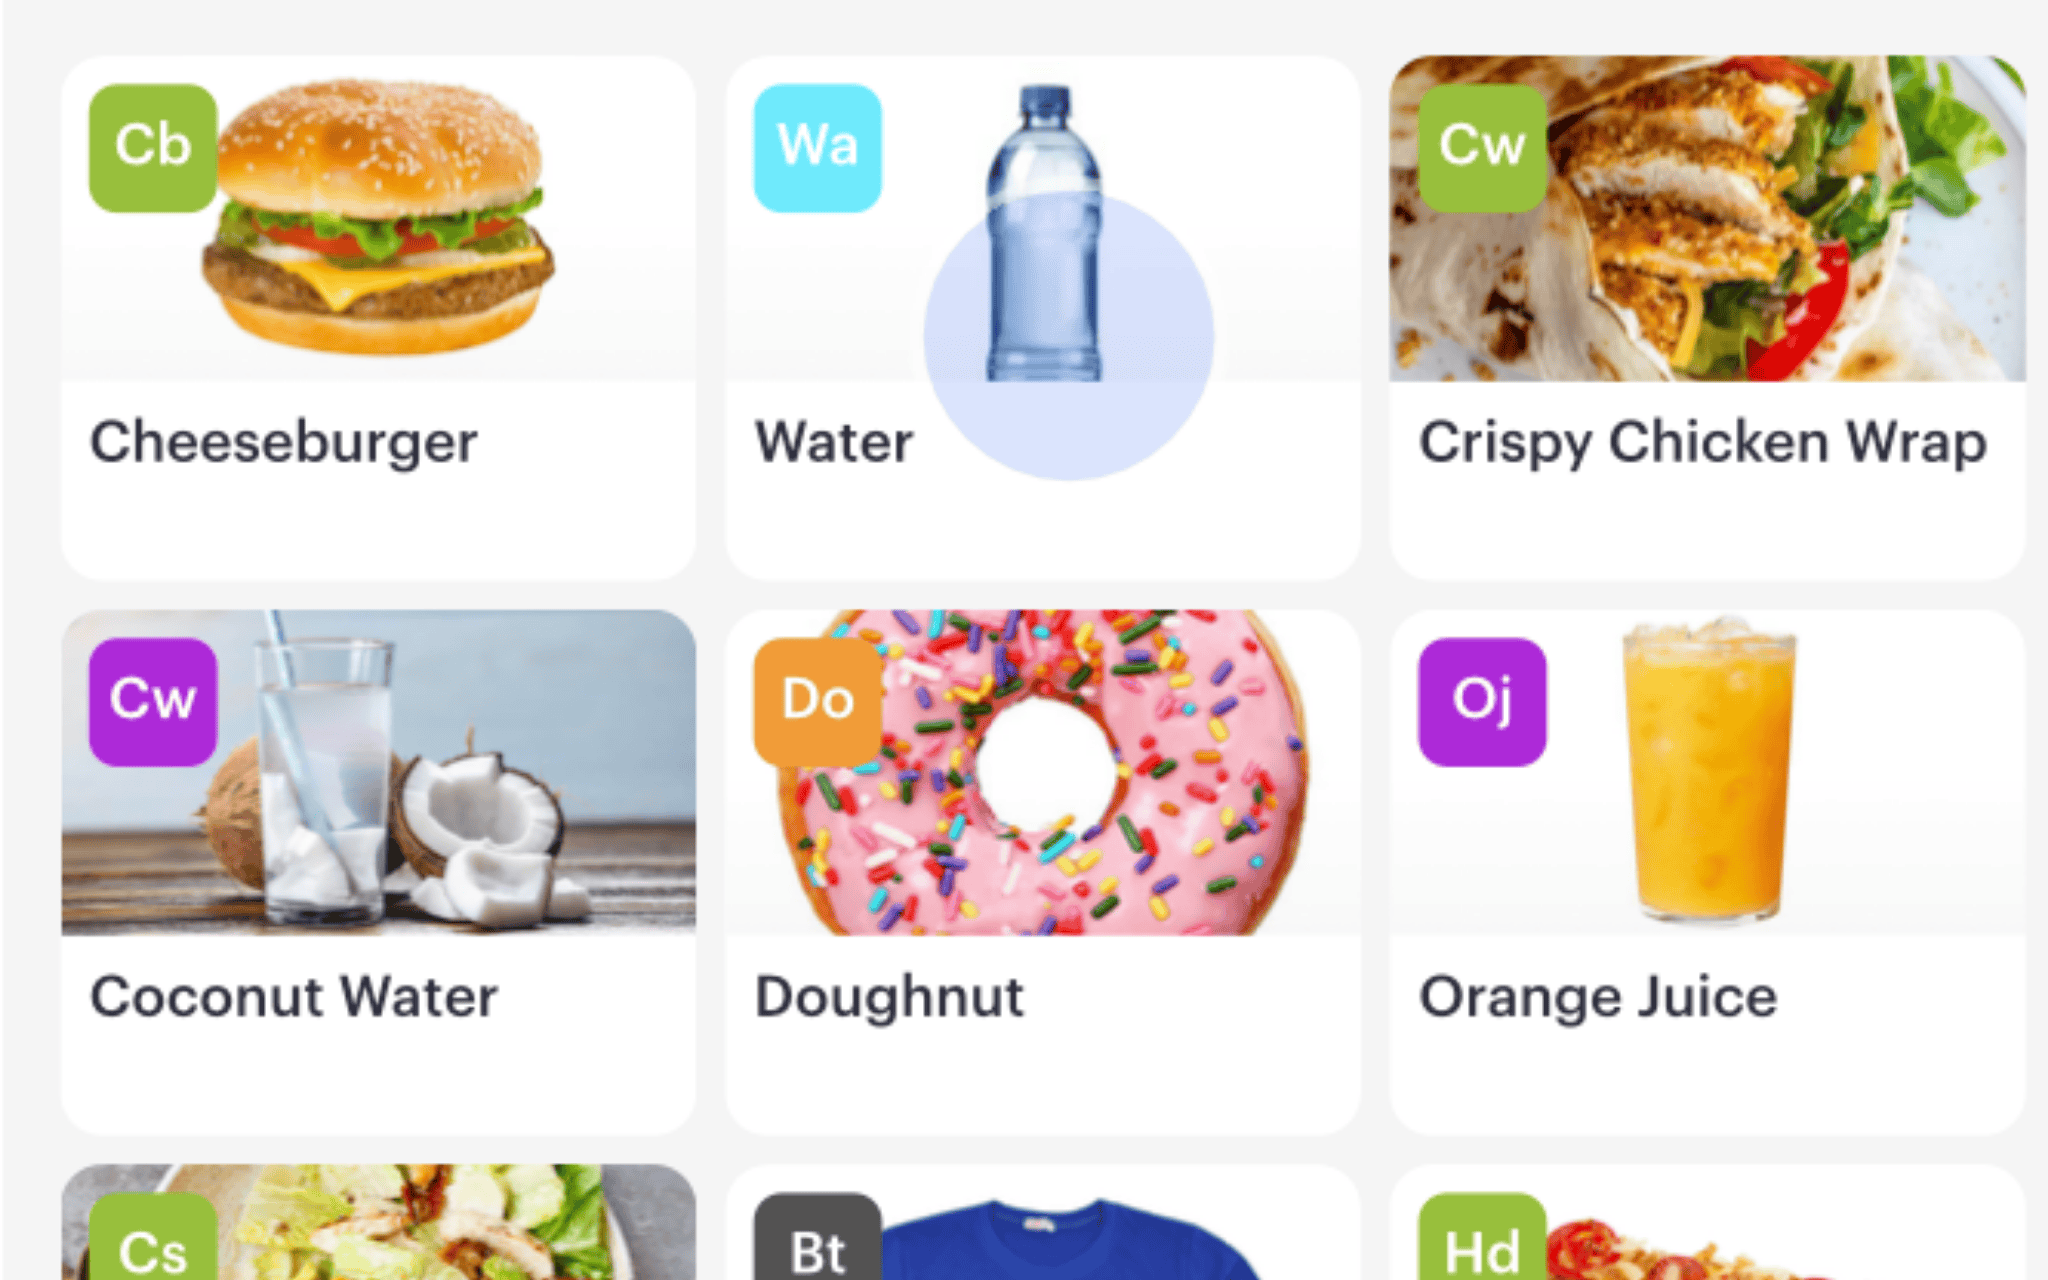
Quick orders are standard transactions in which goods and services are exchanged at the time of payment.
-
Tap on items from the menu to add to the cart. 1 Tap = 1 Item in cart
-
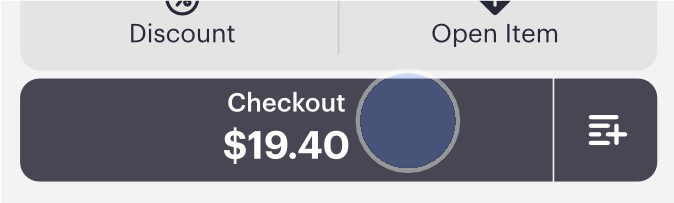
When the order cart is complete, tap “checkout”
-
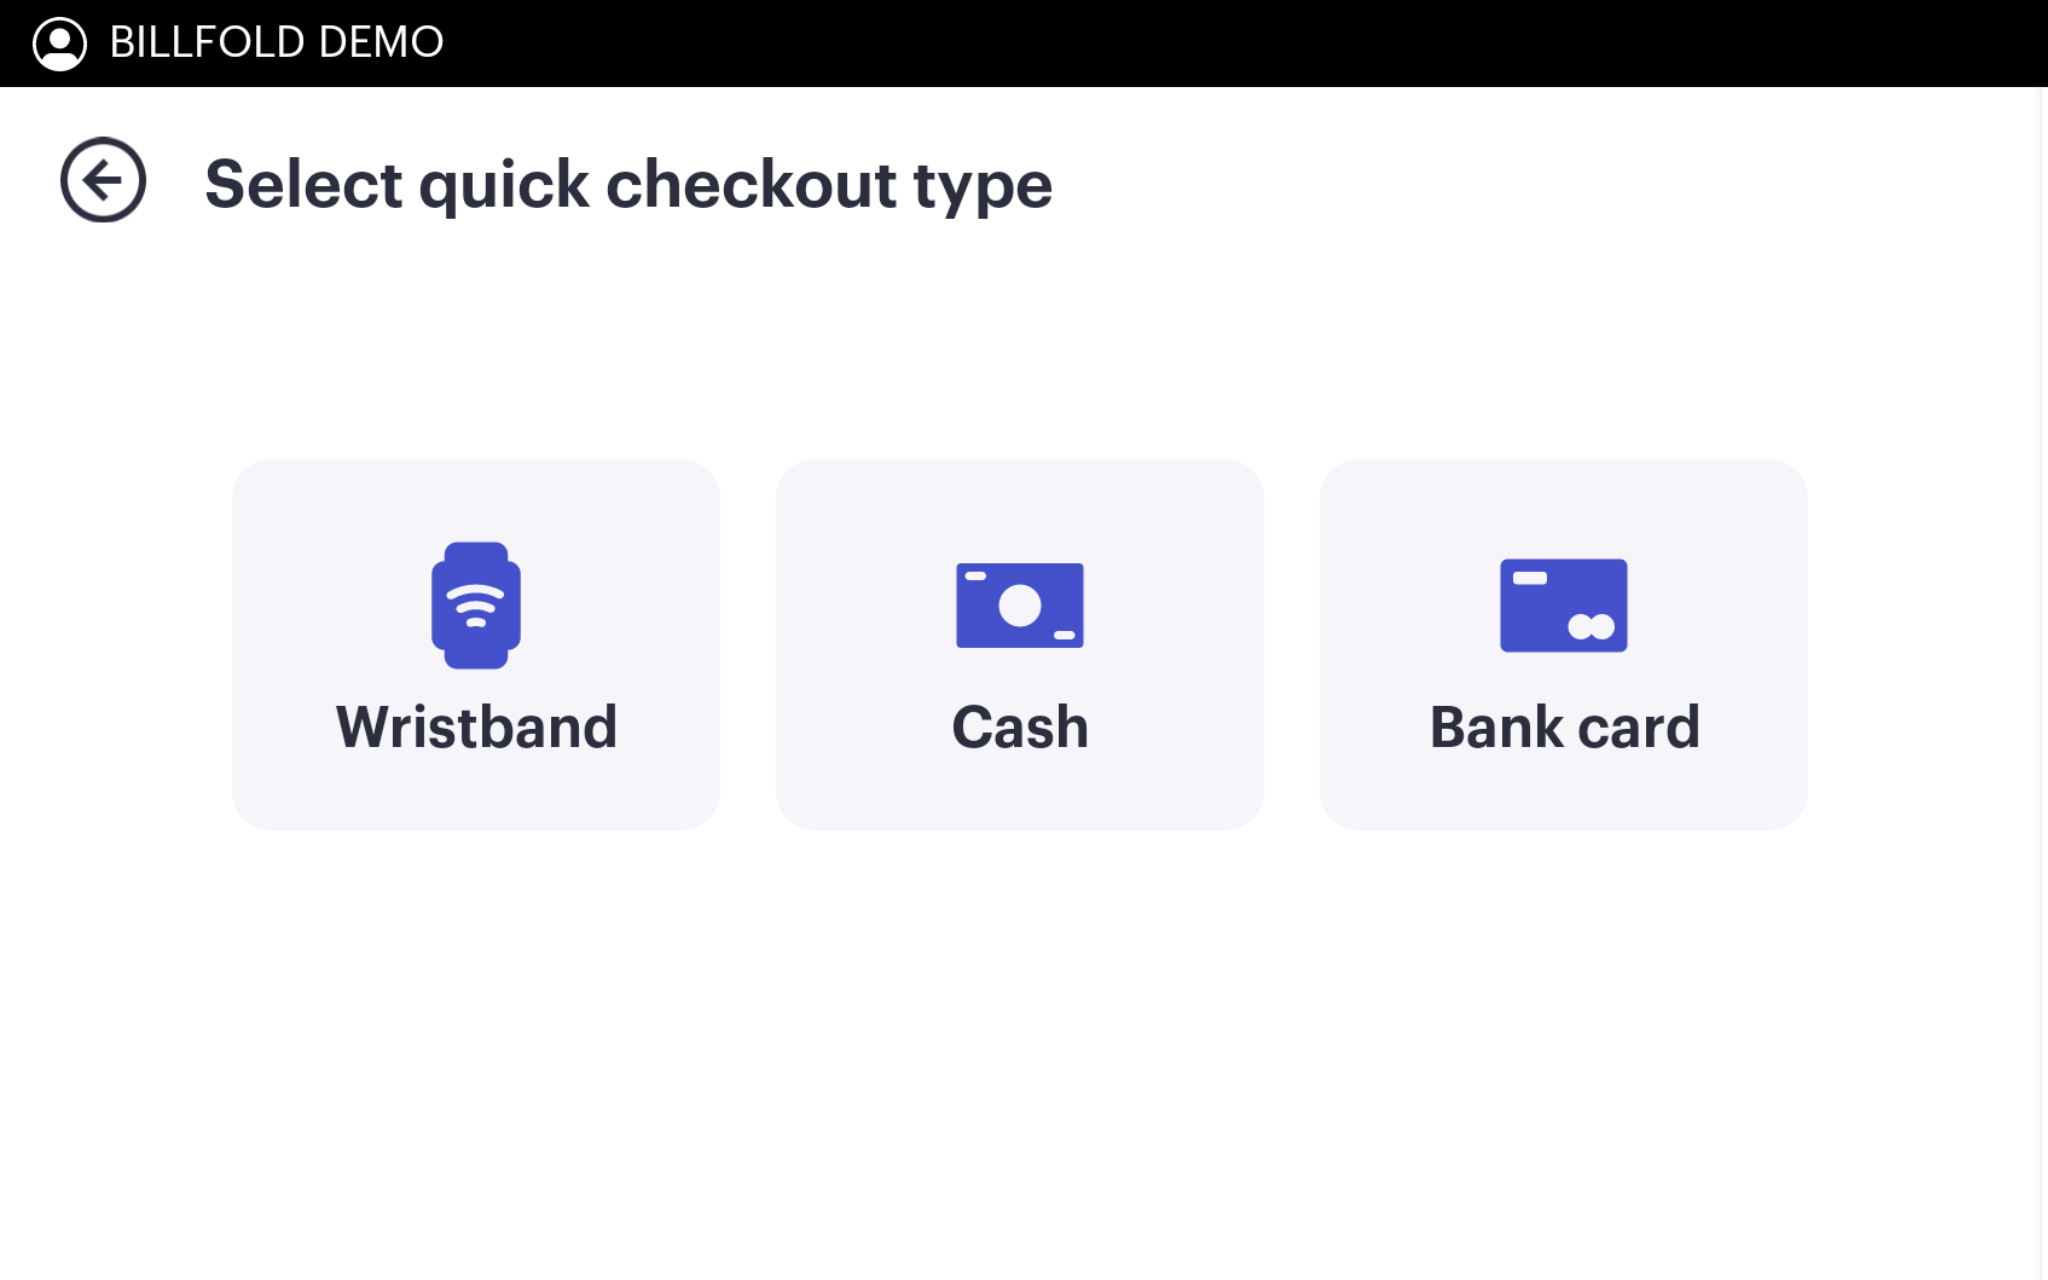
Select the payment type.
Note: if there is only one accepted payment method for the operating revenue center, the POS device will skip the payment selection screen and run the default payment method.
-
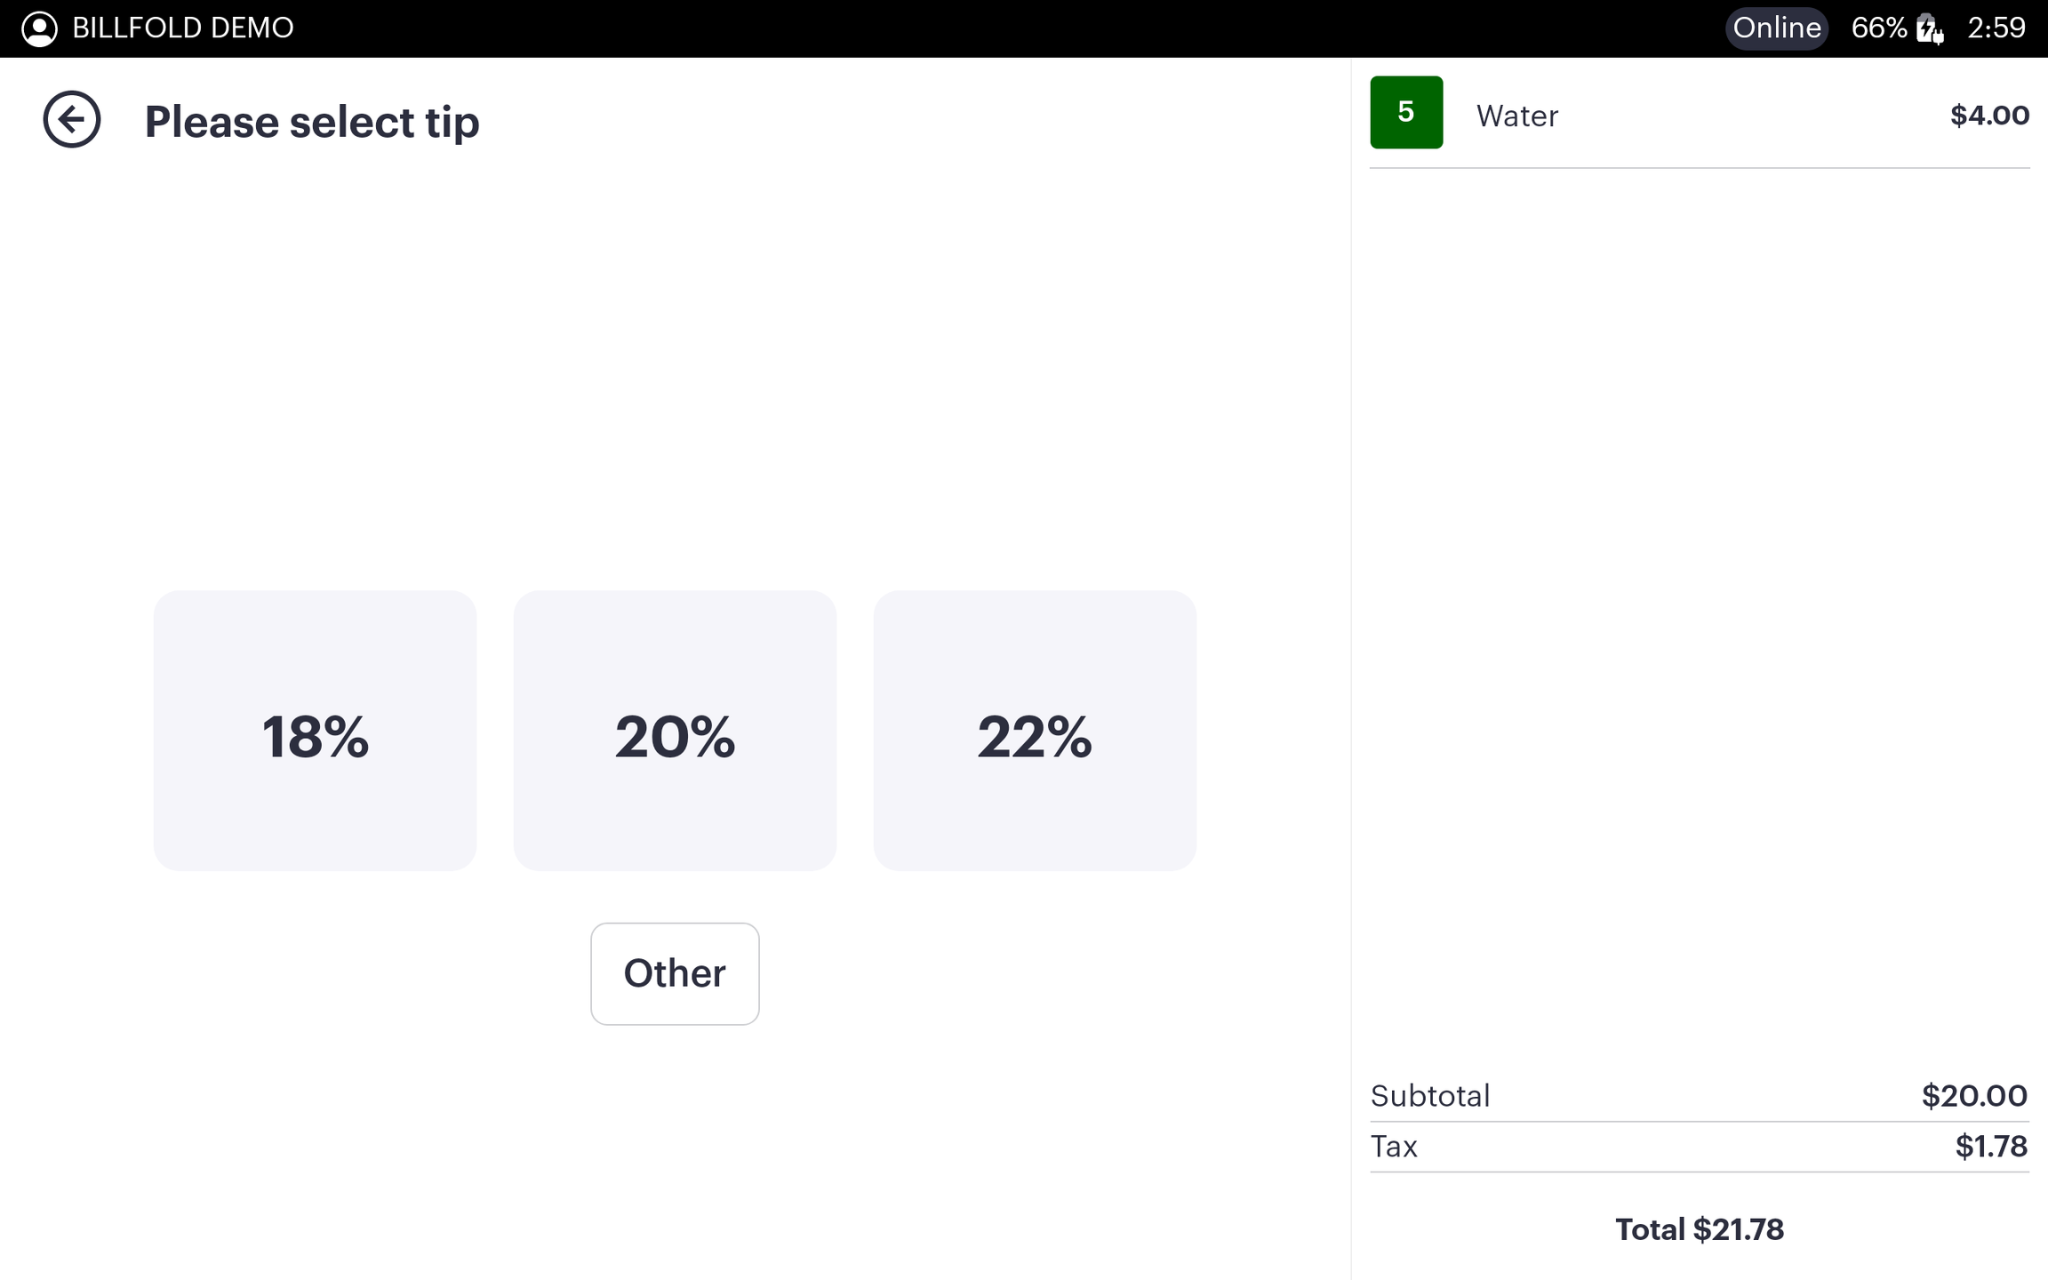
Guests will be prompted to select a tip option if the revenue center accepts tips, and then they will be prompted to fulfill payment. If tips aren't enabled, this step is skipped.
-
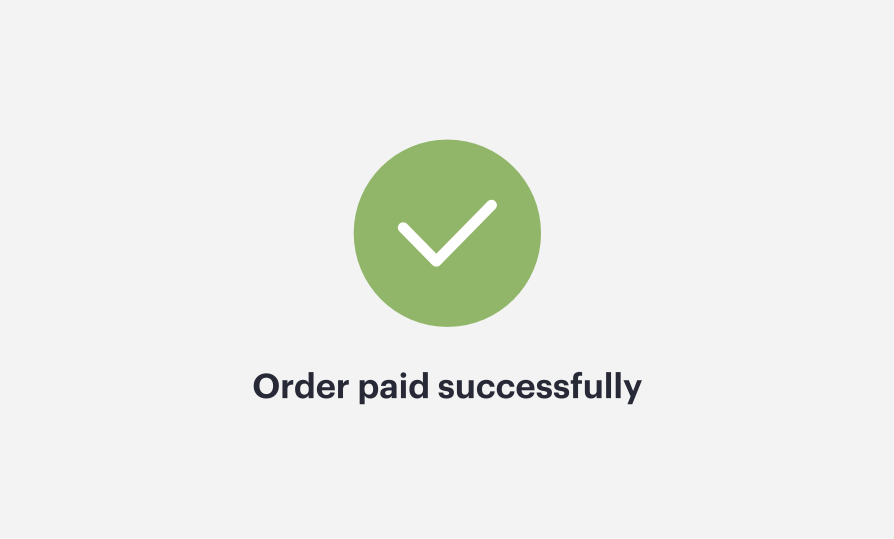
Following successful payment capture, the POS will return a green checkmark. The device will always give a green check mark for successful payment capture, even in offline mode.
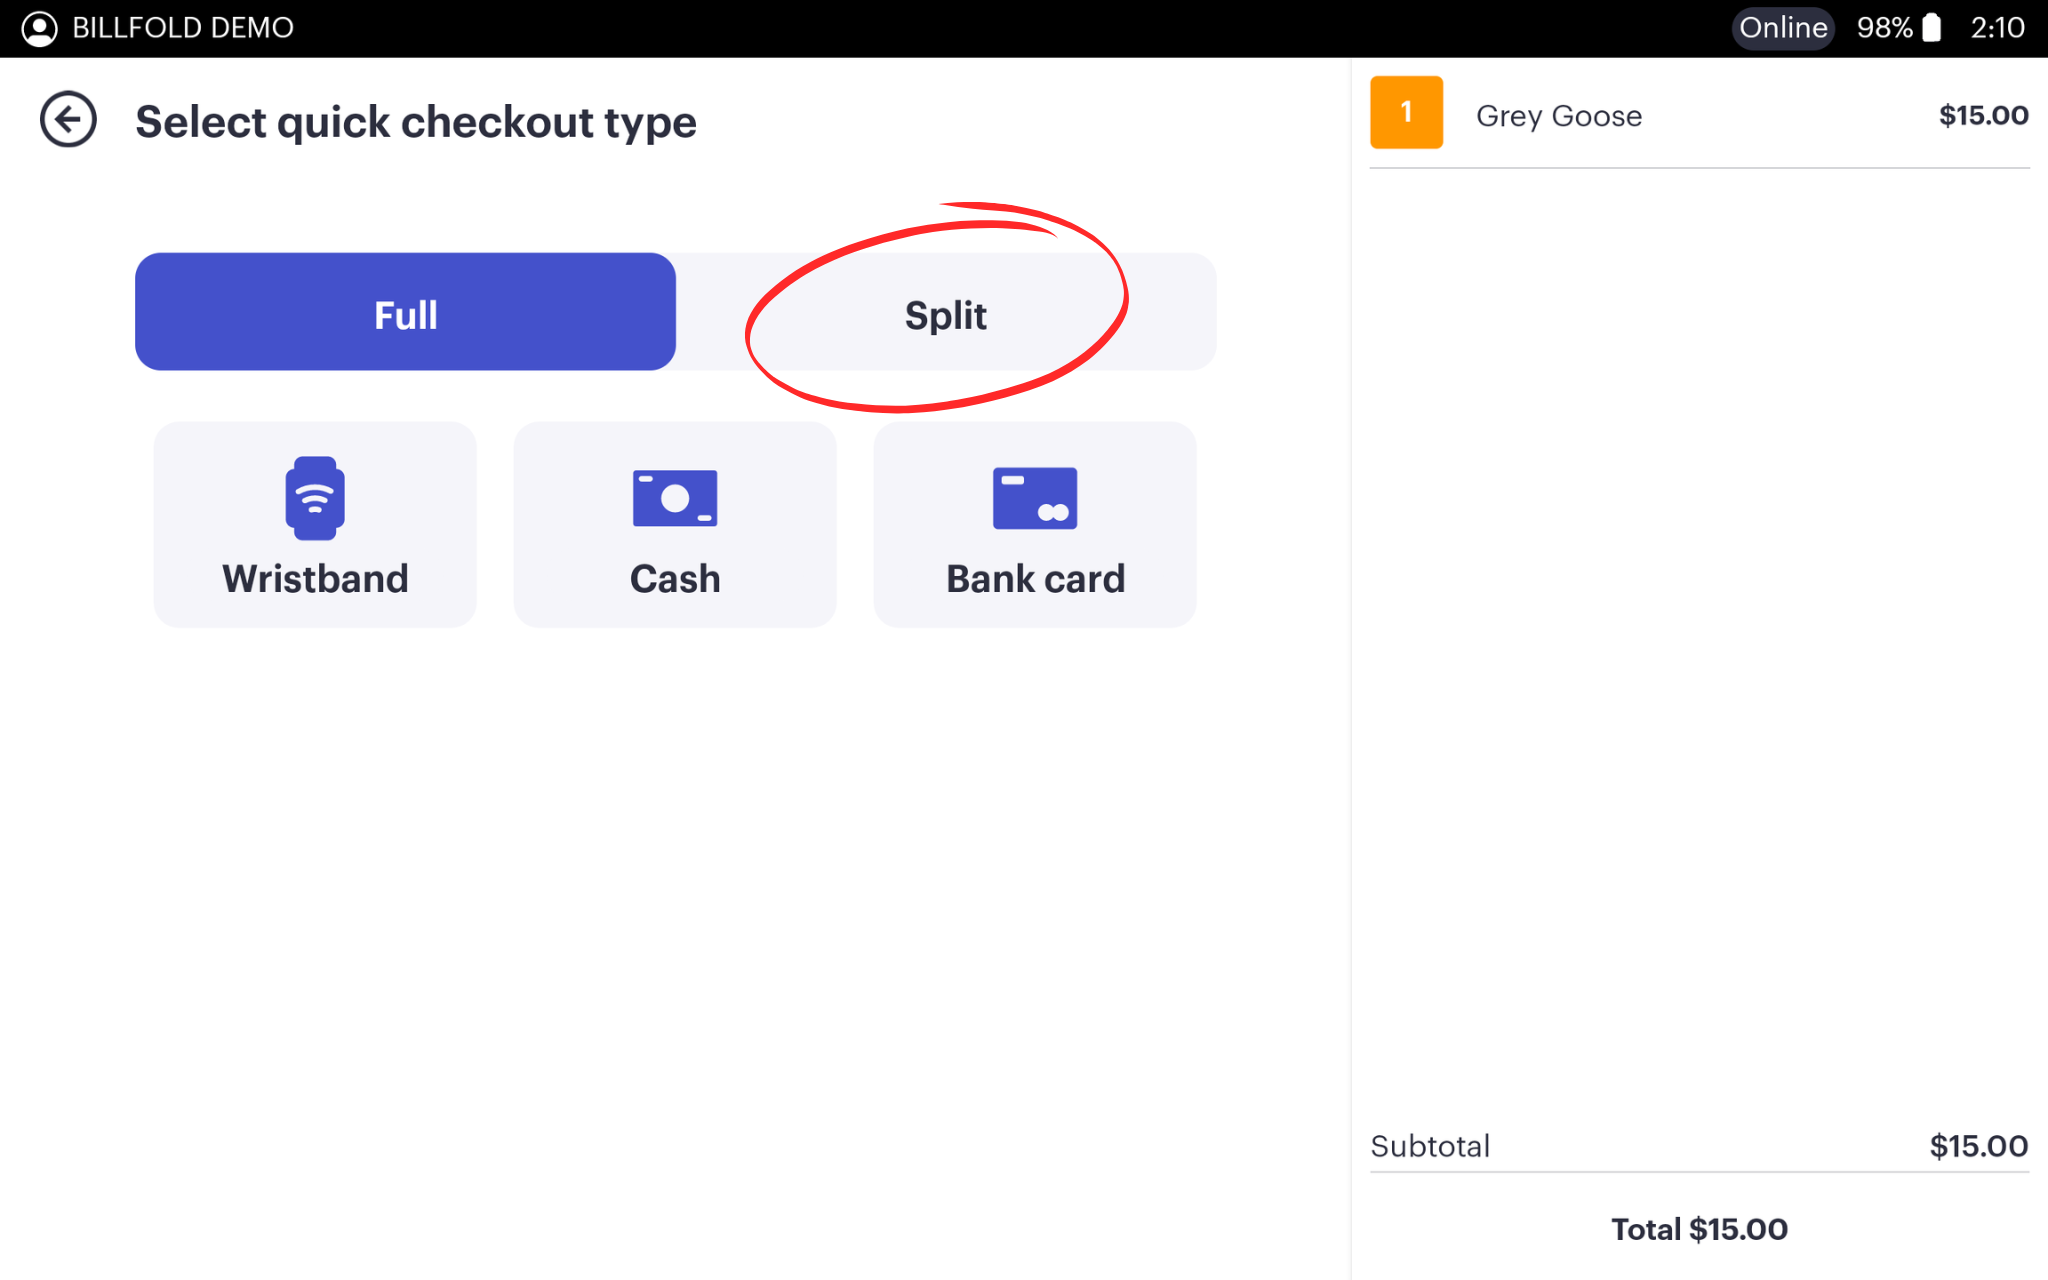
Split Payment Quick Order Checkout
Operators can split payments on a quick order if needed. Toggle split payments within the revenue center settings on the dashboard. Enabling on the device will reset it upon logout and requires an employee permission to be enabled.
-
After building an order and tapping the checkout button, select “Split” at the top of the checkout screen, prior to selecting a payment method.
-
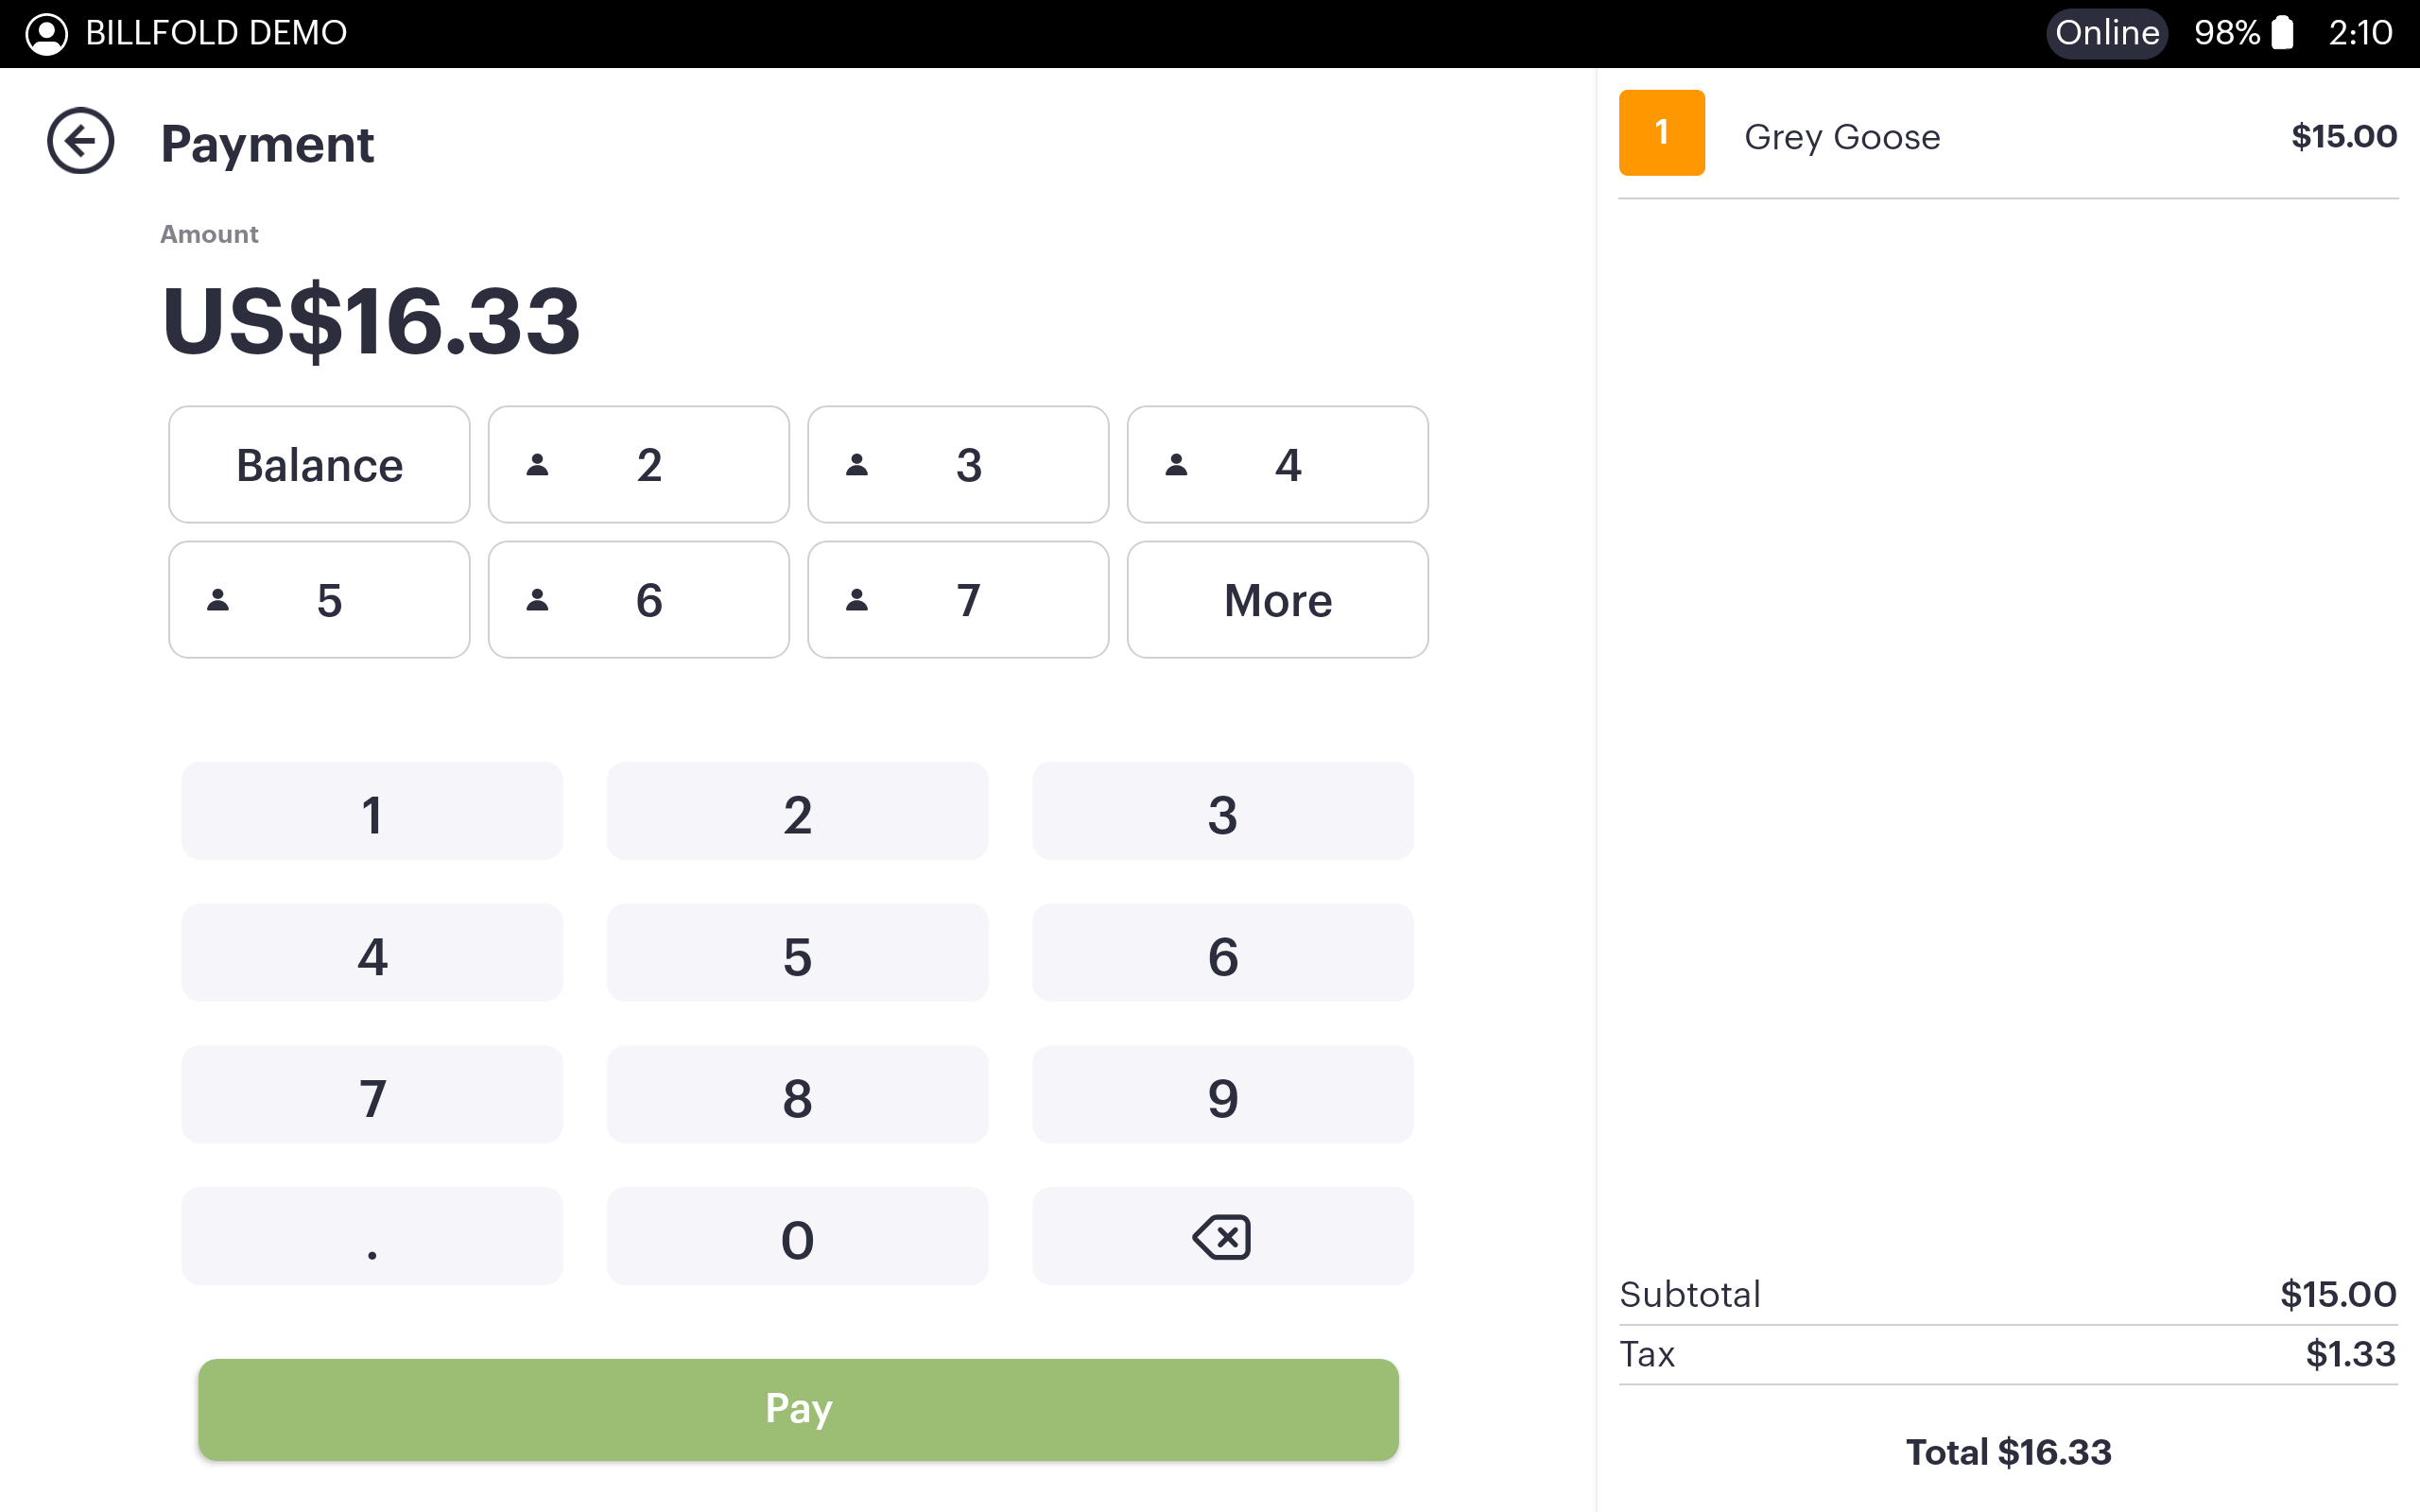
Enter the desired tender amount and tap the green “pay” button at the bottom of the screen.
The POS will return to the tender calculator to close out any remaining balance. Repeat until the order has been paid for in whole.
Basic Open Item Checkout
-
Toggle “Open Item” on within the Revenue Center settings on the dashboard. If no Revenue Centers have been created, it is best to do this at the Event settings level if you plan to use the feature across your event.
To add at the Event Level, use the features dropdown here.
To add at the Revenue Center level, go here.
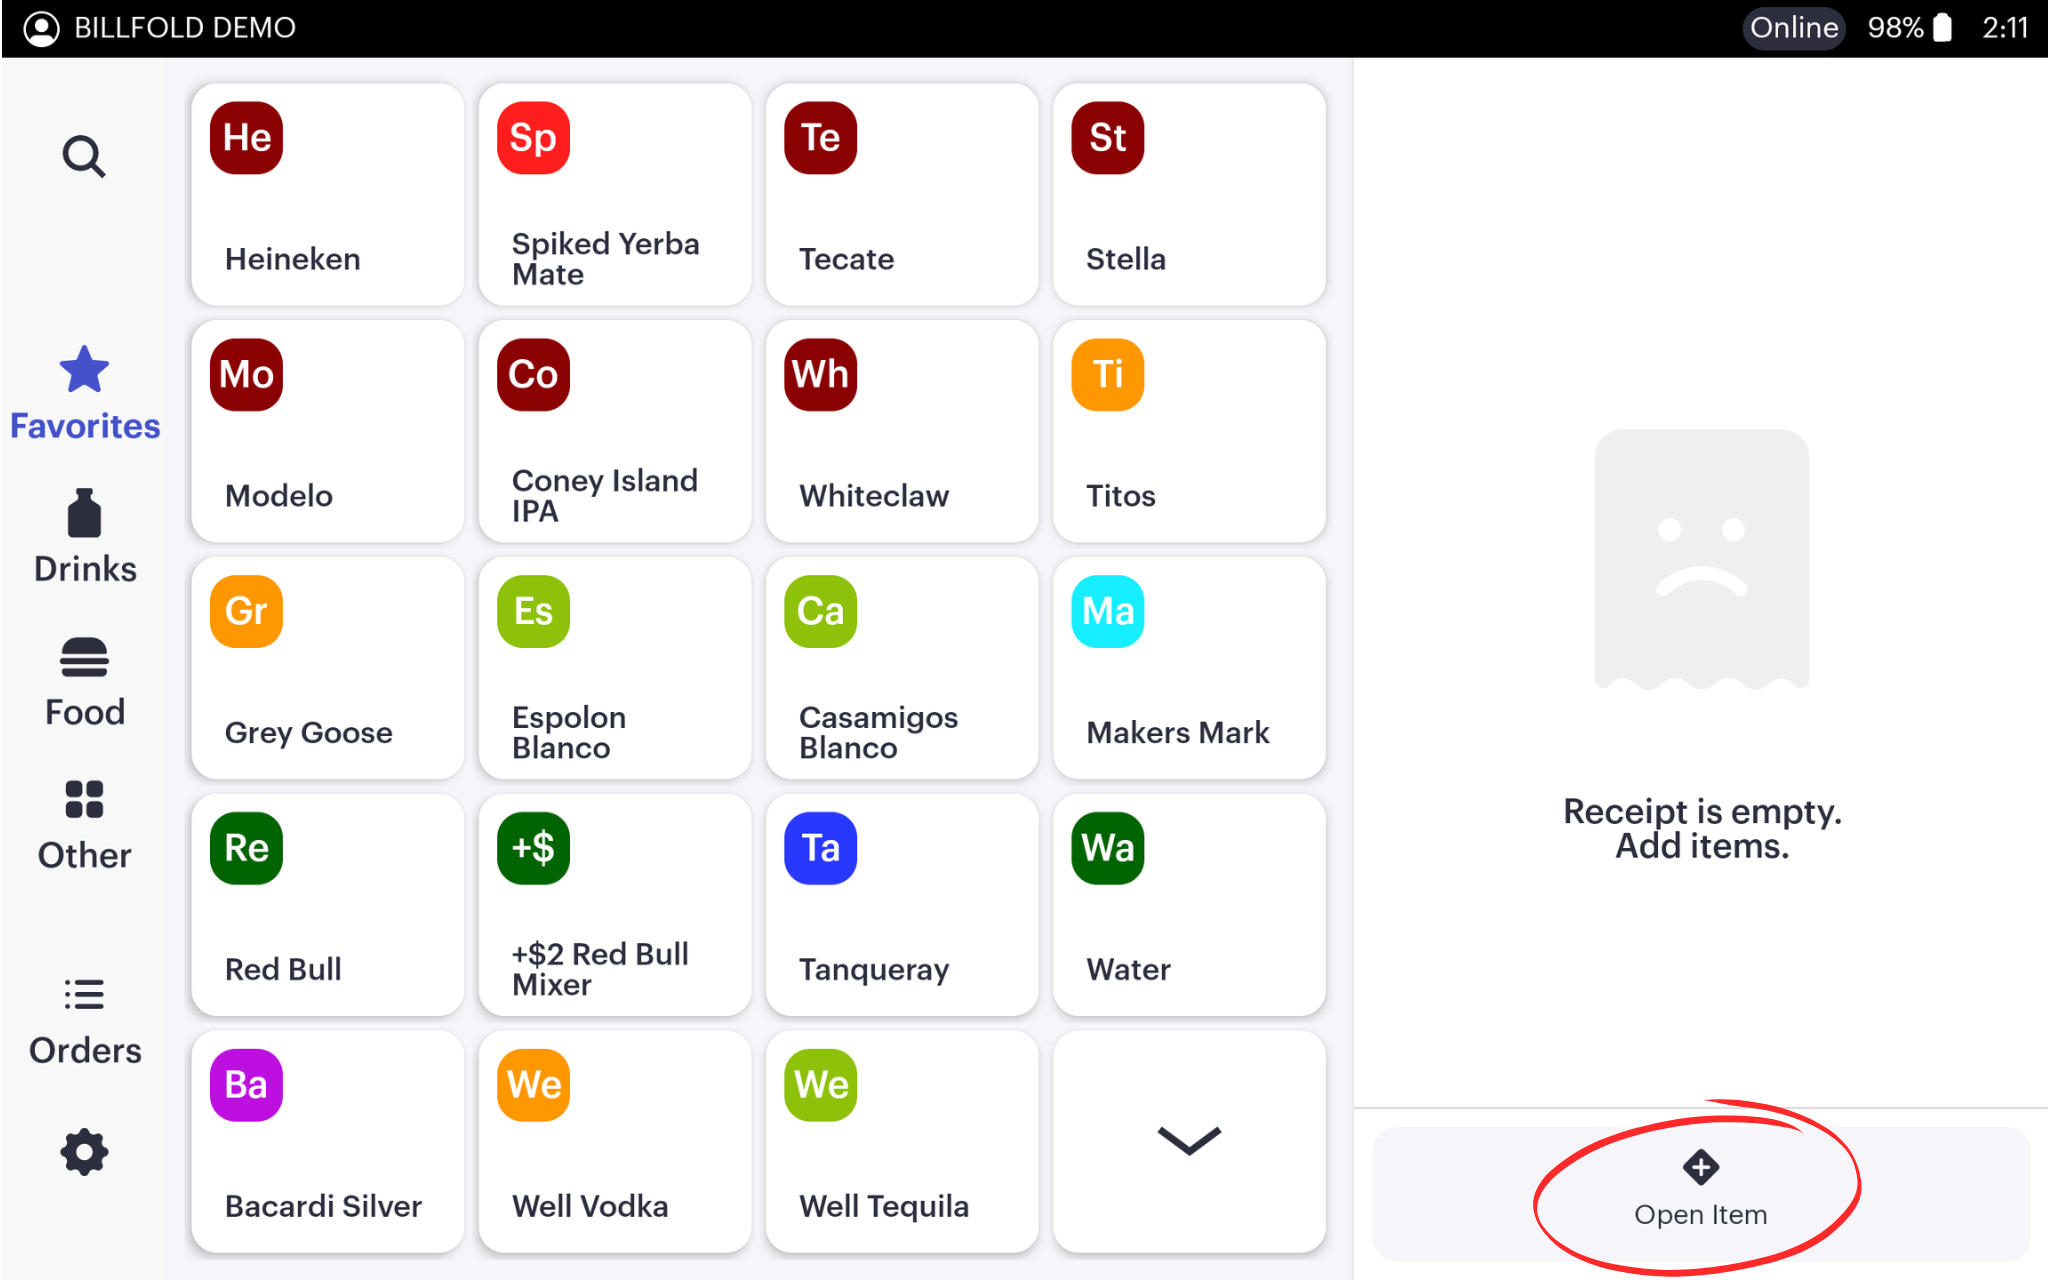
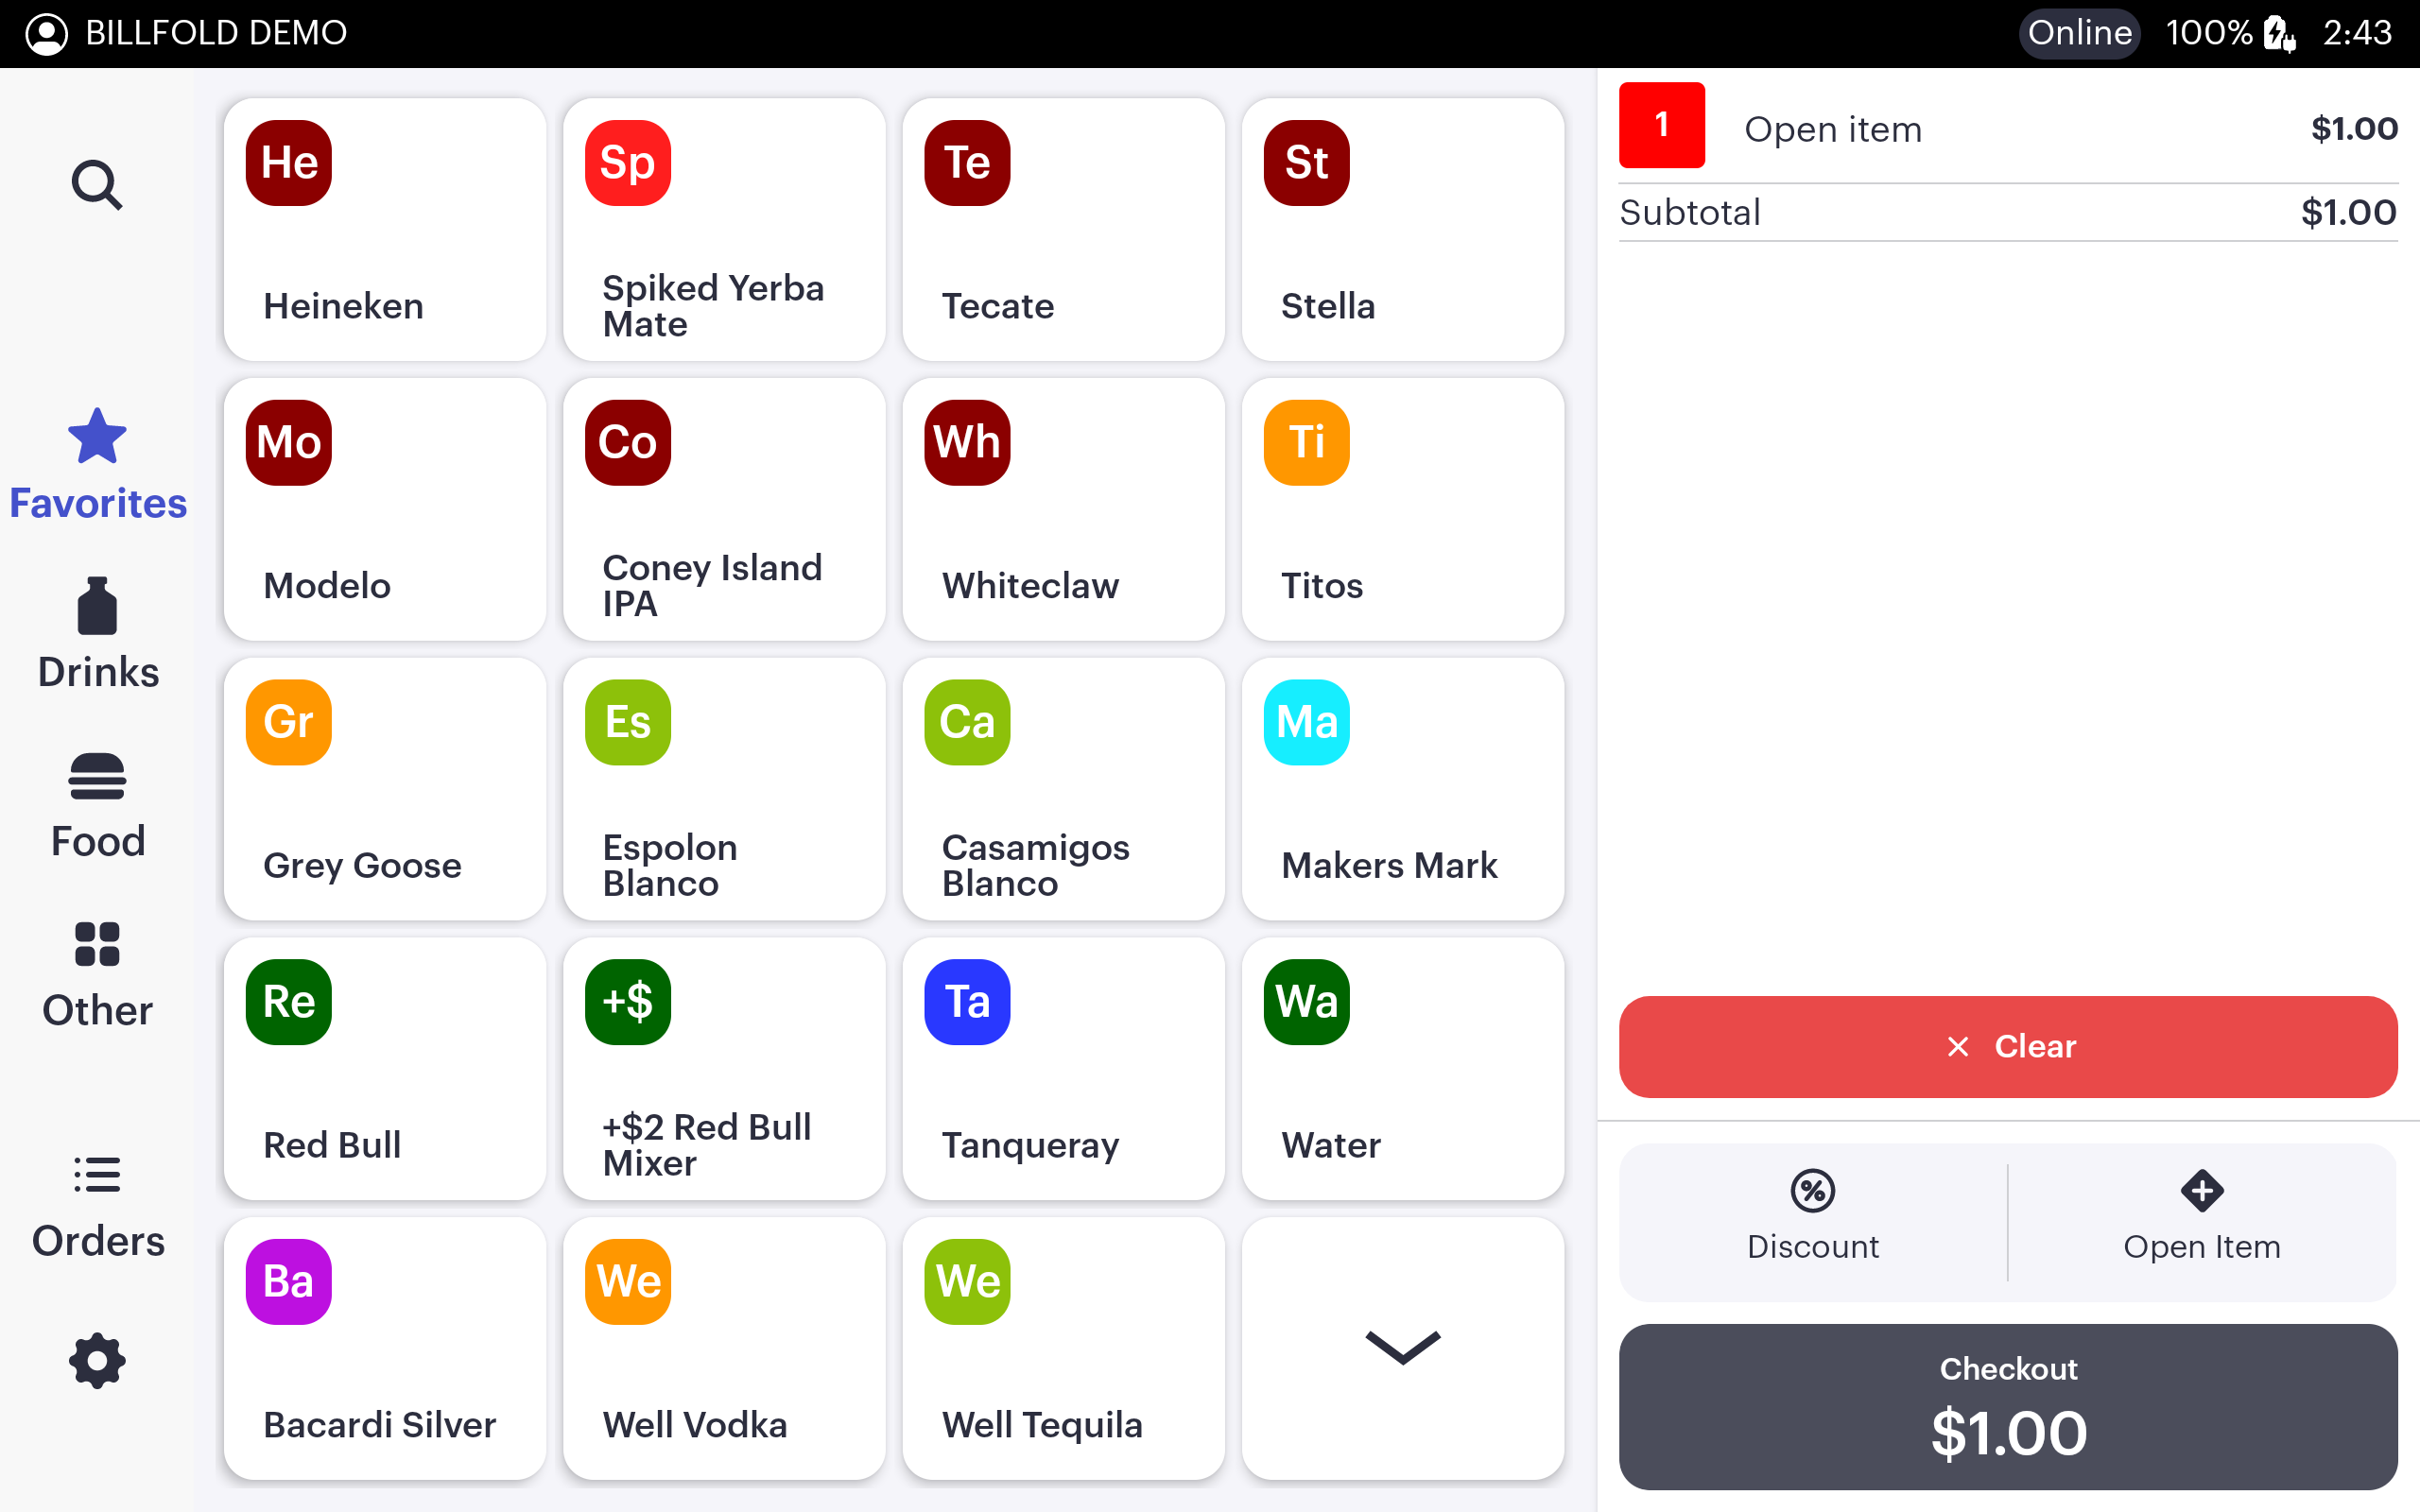
An “+ Open Item” button will now appear at the bottom of the order cart on SS and DS POS.
If utilizing HH, tap the checkout button at the bottom of the screen to see the cart preview with “+ Open Item” button -
Quick Open Item: This should be used if no item tracking is required for the item being sold; it will show simply as “Open Item” on the Item Sales Report.
-
Open items default to the revenue center settings that they are created under, such as programmed tax and service charges
-
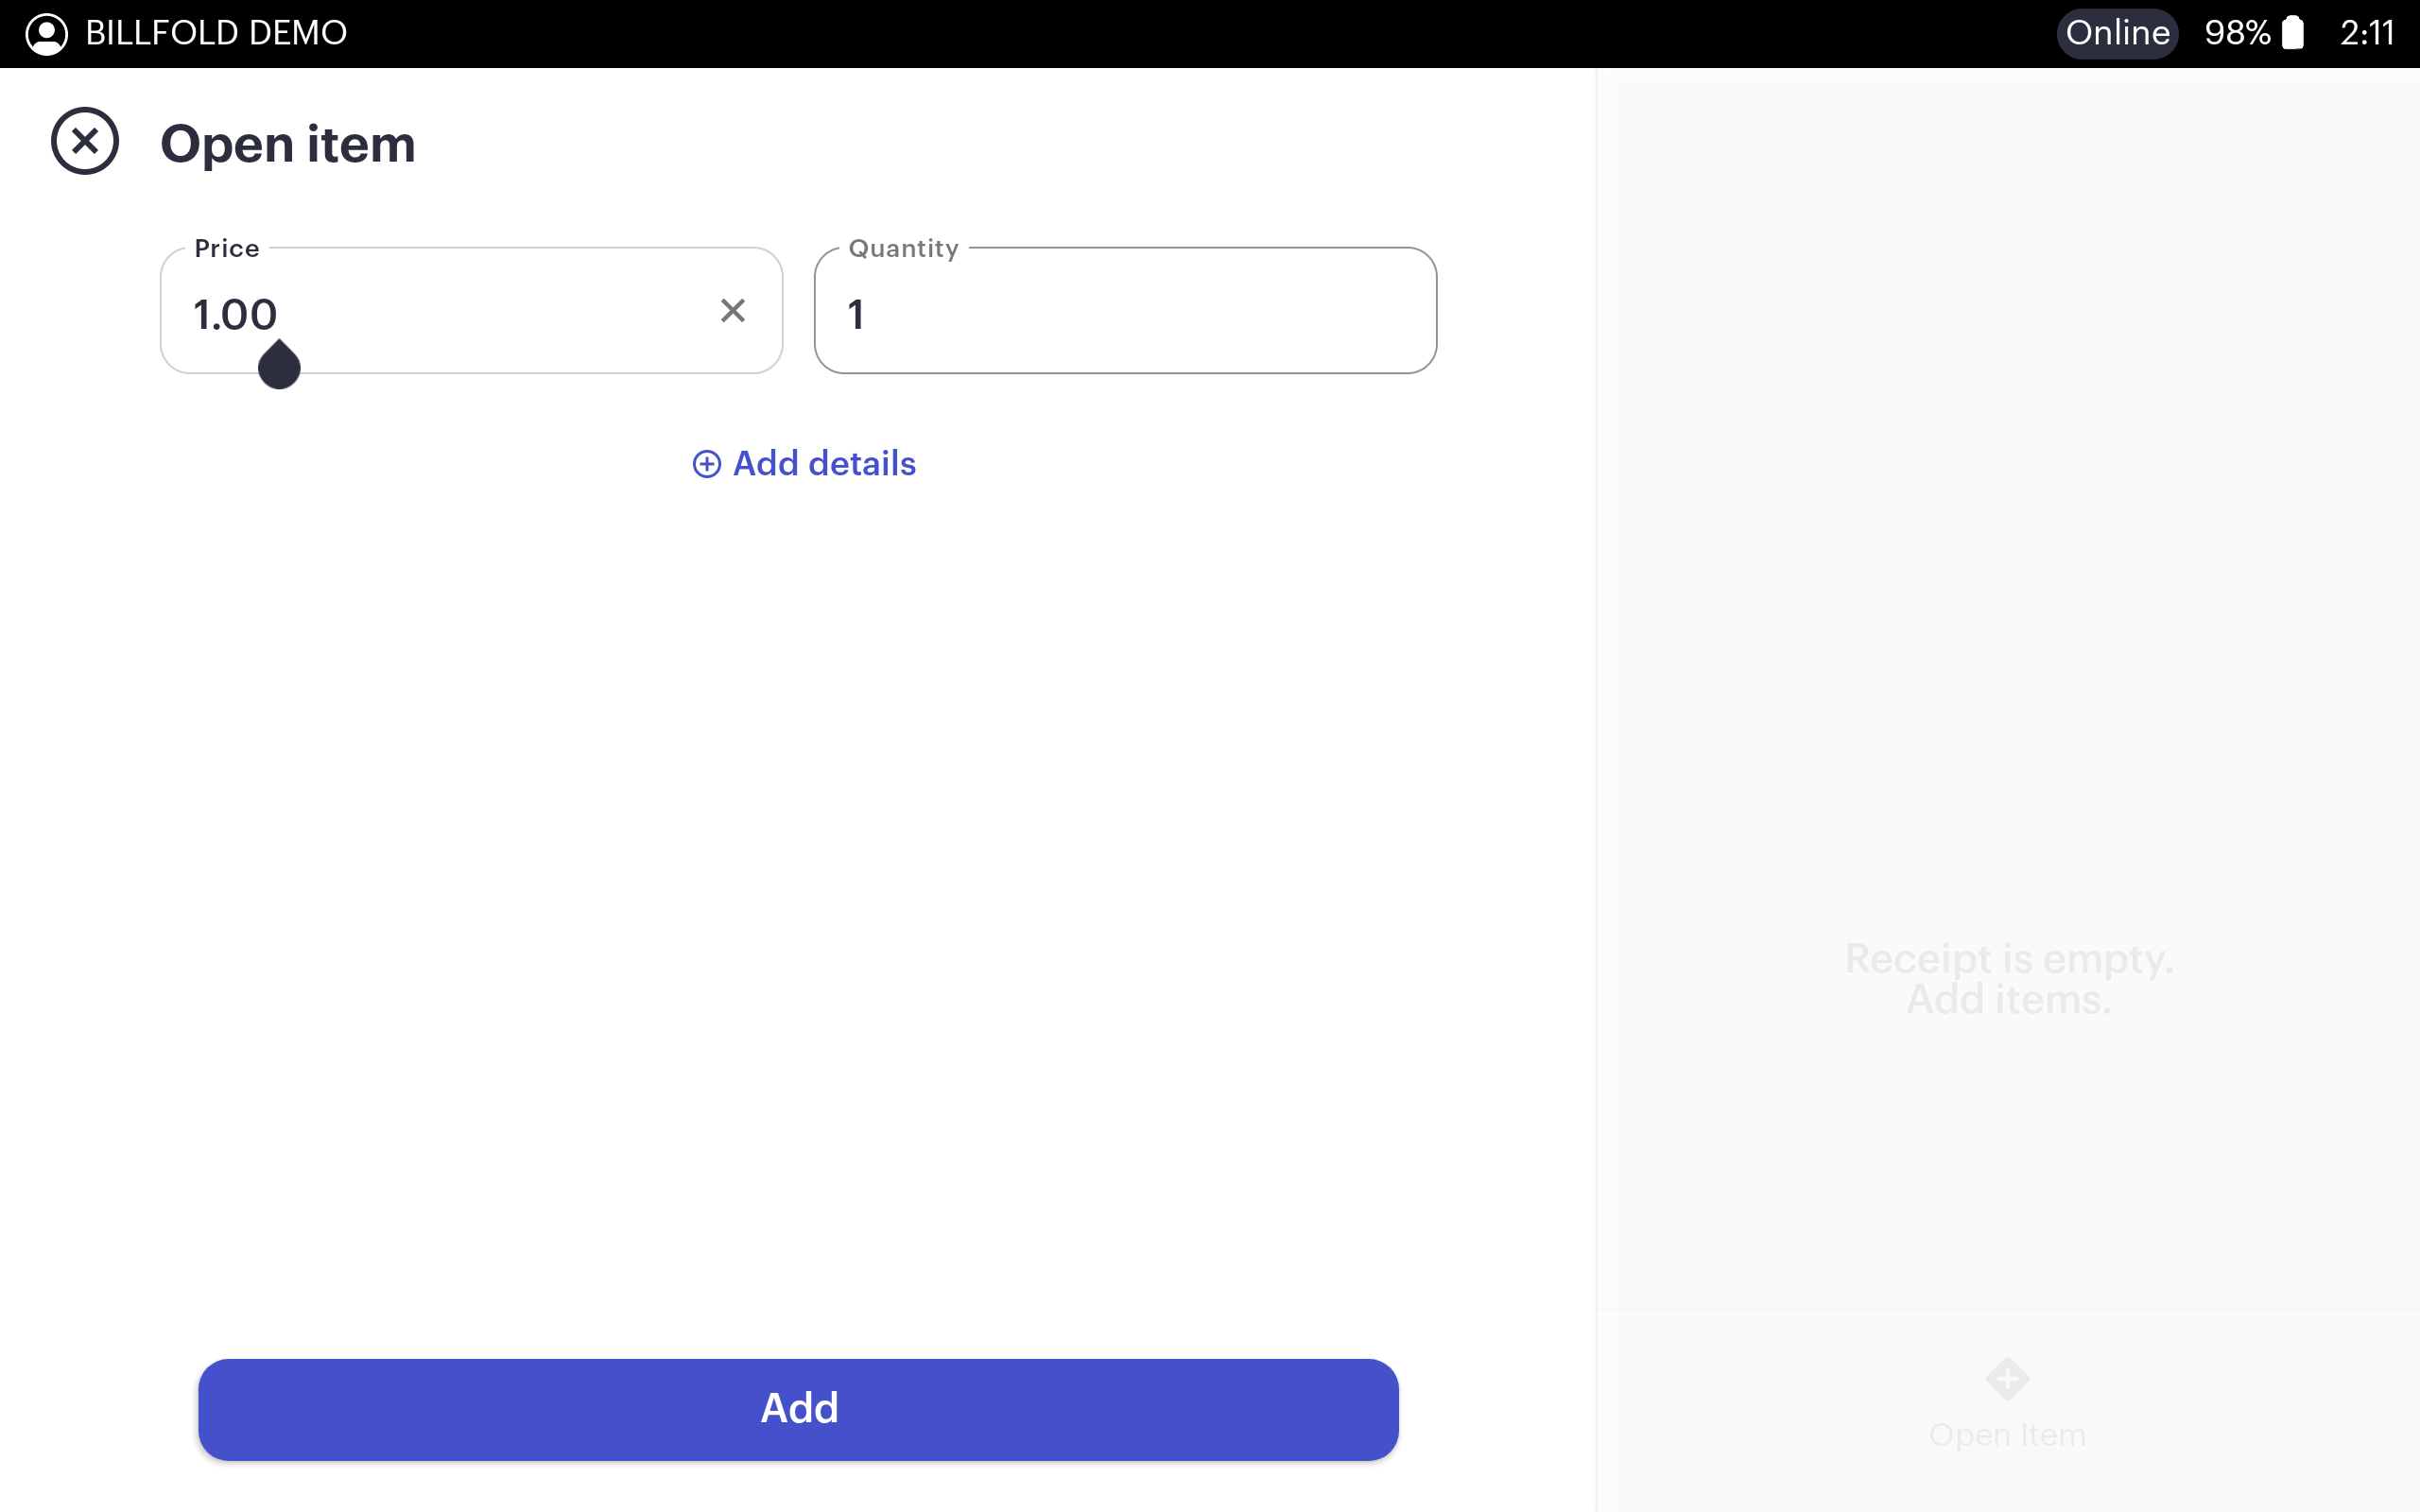
Tap “+ Open Item” in the order cart to create the open item
-
-
-
Enter the price of the item and the quantity being sold, then tap “add” to add the open item to the order cart
-
-
-
The custom open item will show in the order cart, proceed with the order and upon completion, check out using the desired payment method
-
Detailed Open Item Checkout
-
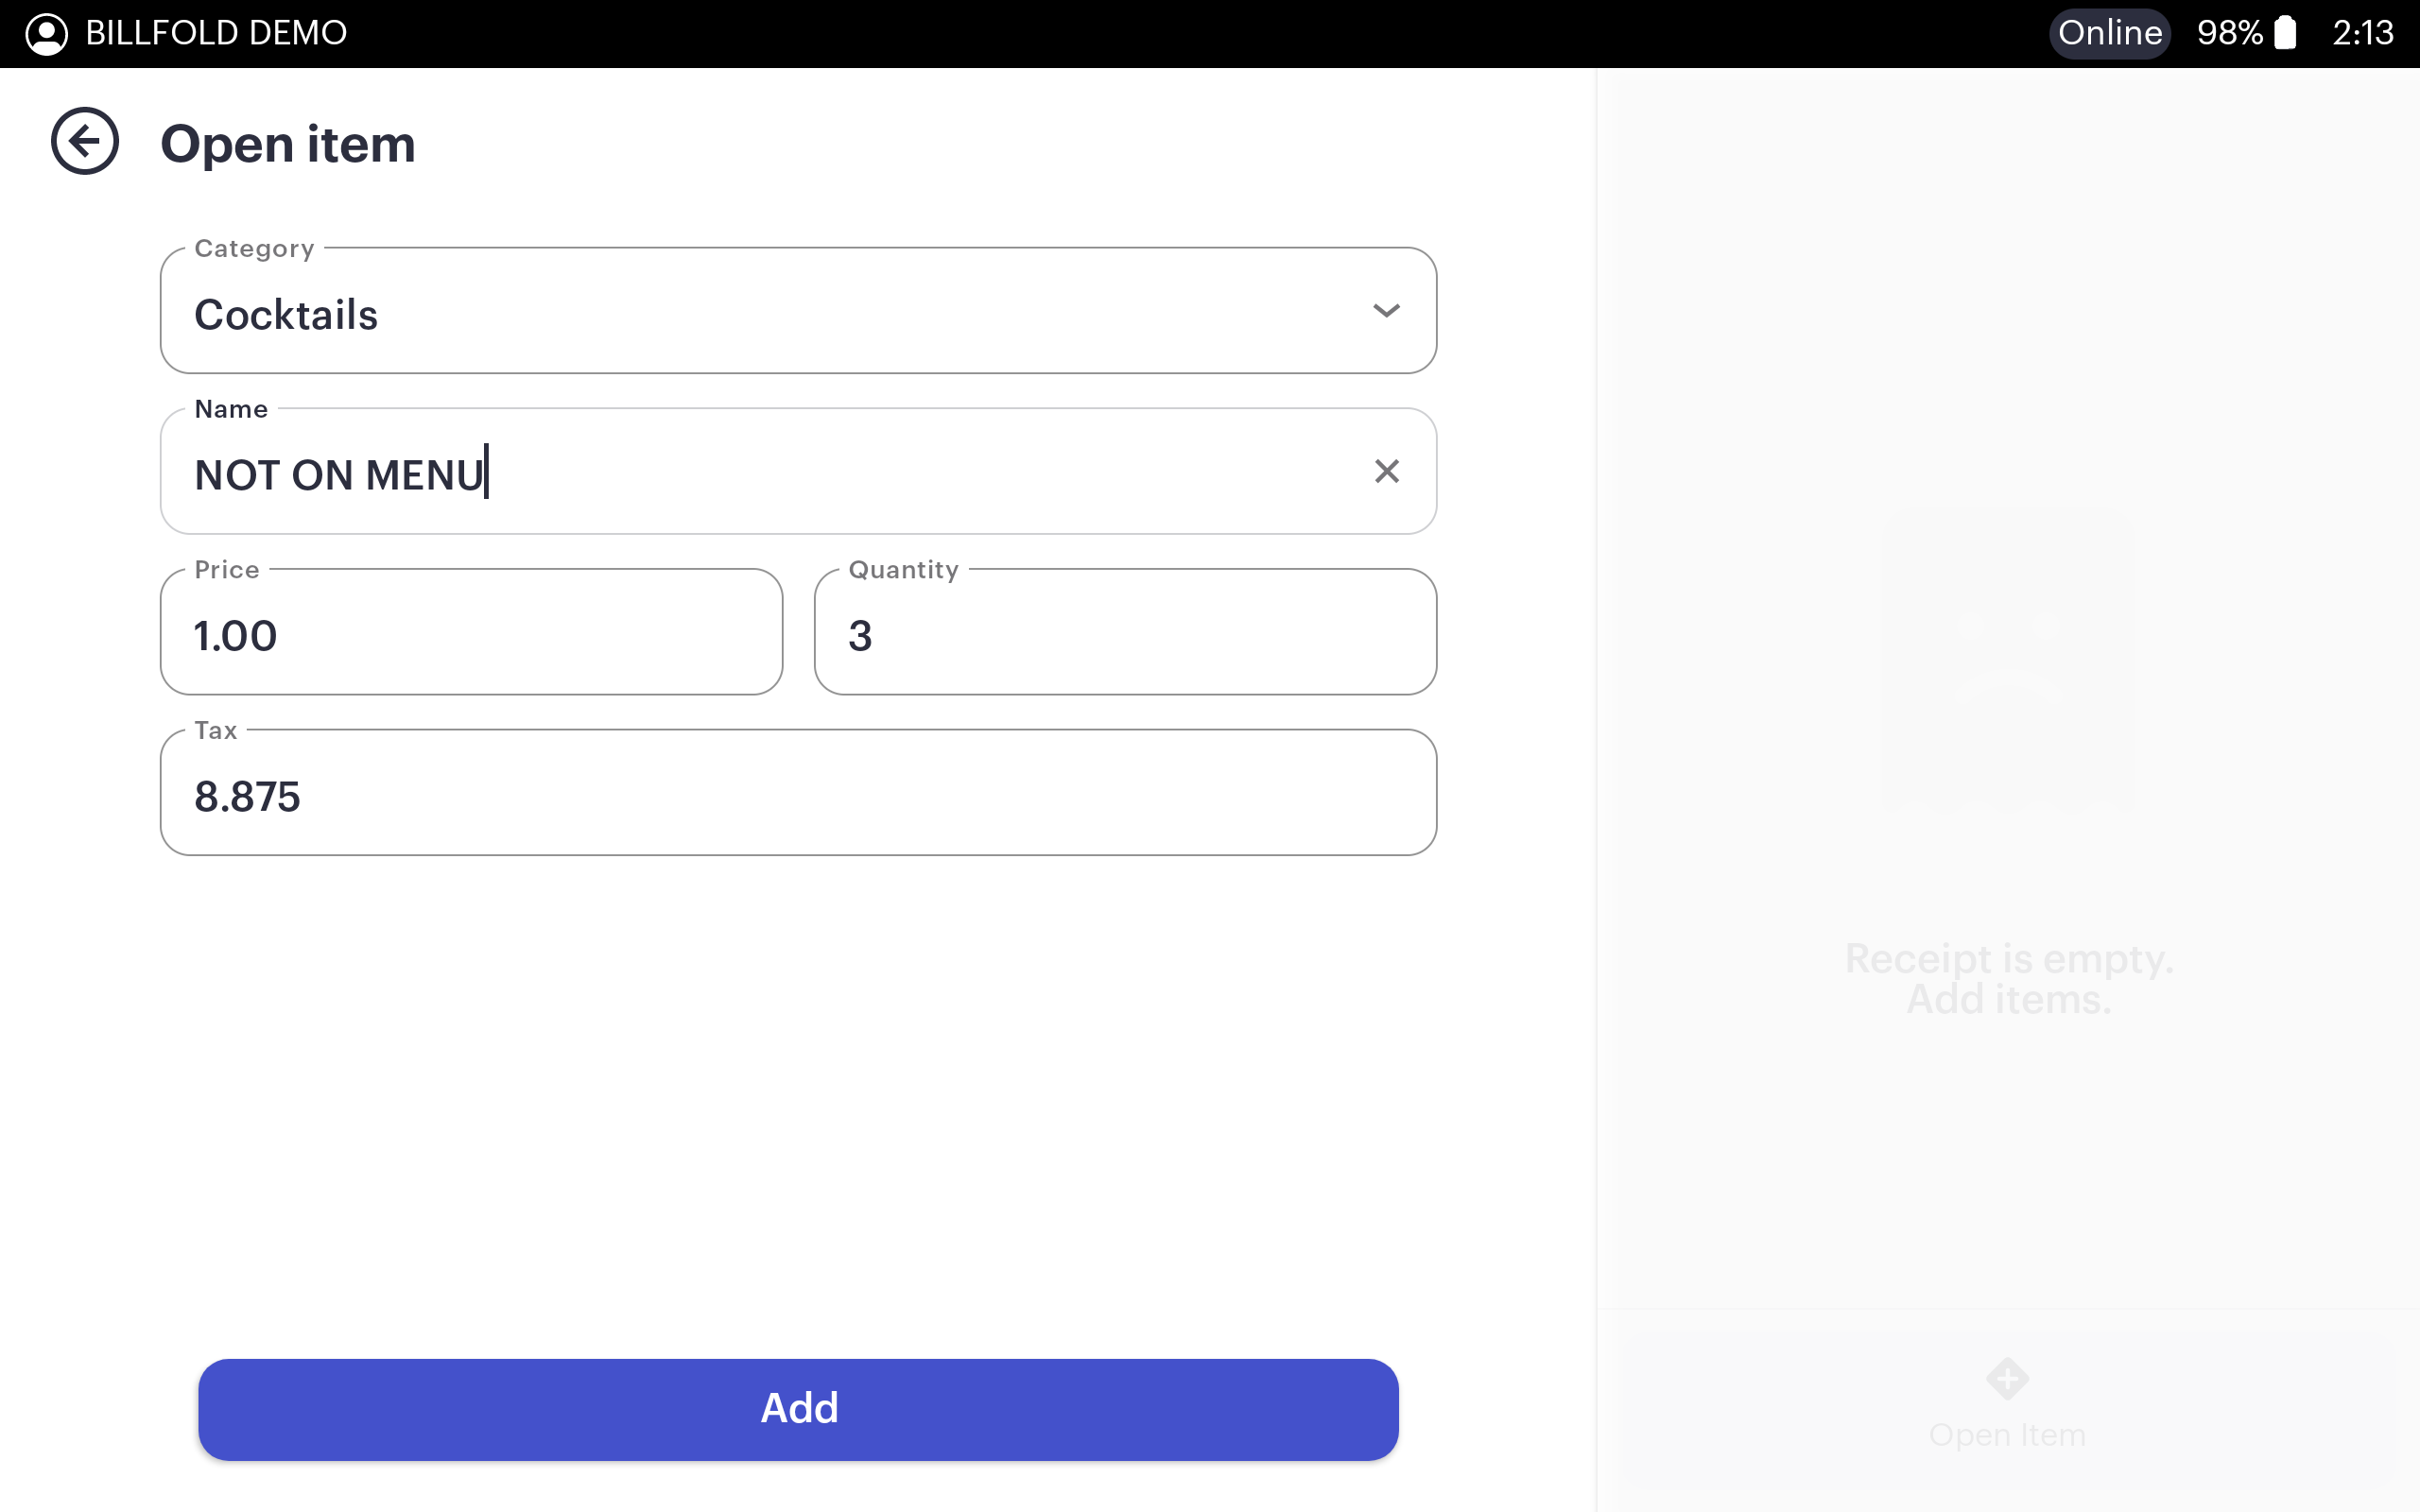
Used as reference for tracking of open items that are being sold; assign a name, item category, or new tax fee to the open item that will populate in the Item Sales Report
-
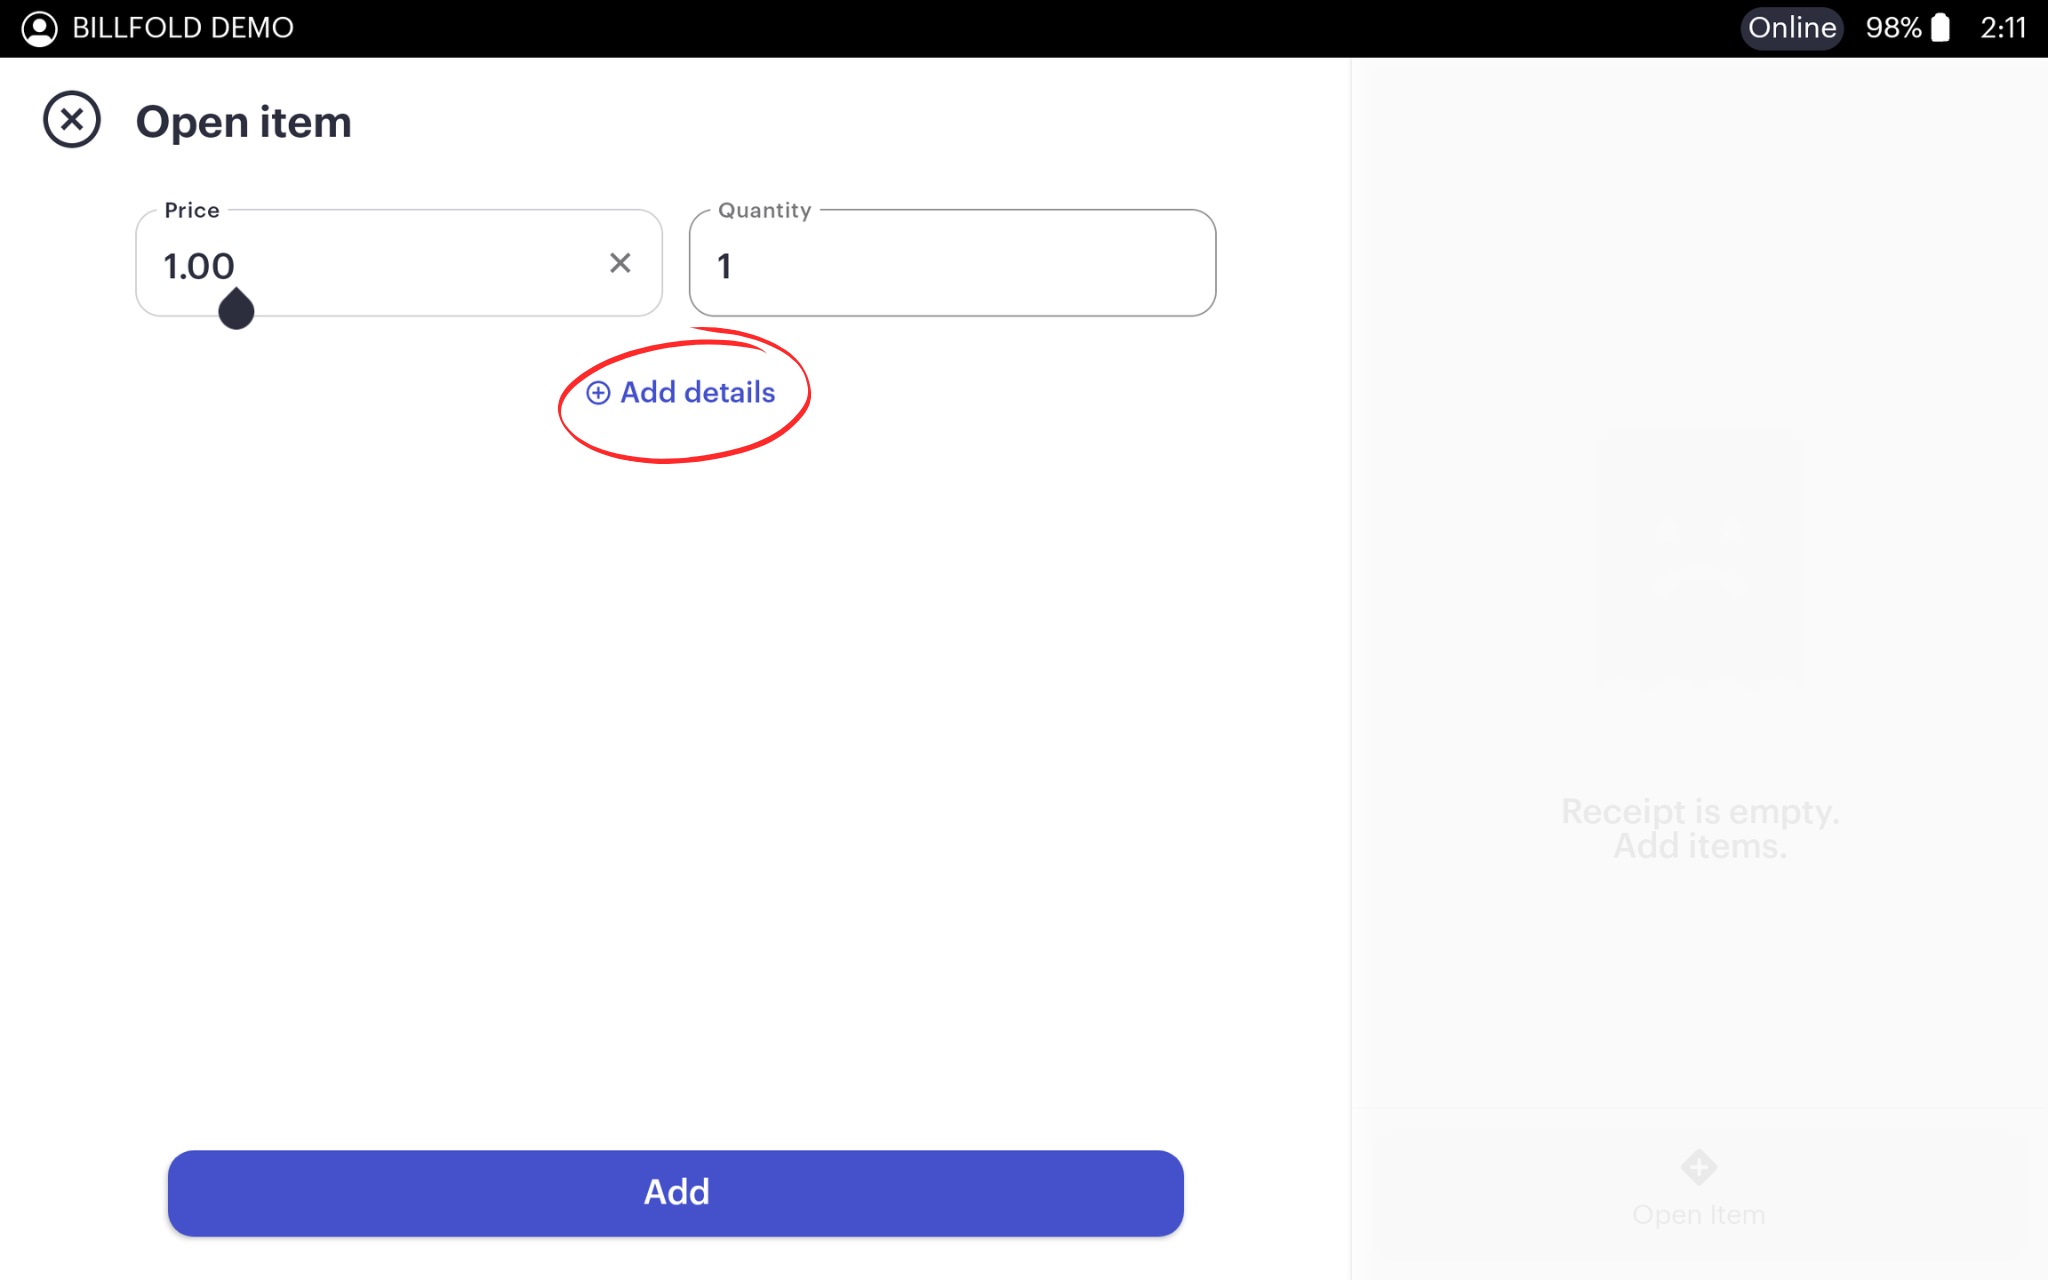
Tap “+ Open Item” in the order cart to create the open item
-
Enter the price of the item and the quantity being sold, then tap “+ Add details” below the price and quantity boxes to open spaces to give reference information
-
-
-
Select a Category from the Programmed Category options, Name the item, Enter the price point, Quantity being sold and adjust the tax, if necessary
-
-
-
The custom open item will show in the order cart, proceed with the order and upon completion, check out using the desired payment method
-

Refunding Orders from POS Device
-
Open the transactions list by tapping the order list icon on the bottom left corner of the Bartender application (top right corner if using HH POS)
-
Select the order you wish to refund, then tap the Refund icon on the bottom of the order review
Only orders that have landed on the server can be refunded. If an order status is “Pending” or “New” the organizer will need to wait until the order becomes “Paid"
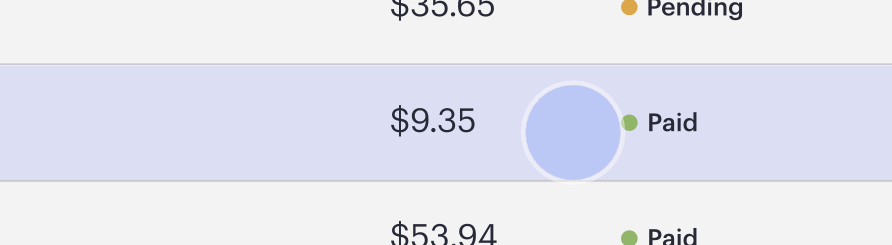
-->

-
Select “done” to refund the total order to original payment method.
-
If initiating a partial refund, input the refund amount before selecting “done” button to refund a portion of the transaction to the original payment method.
VERY IMPORTANT TO NOTE: Refunding a portion of an order transaction will NOT update the item sales report. Only refunding a full order will update the item sales report. -
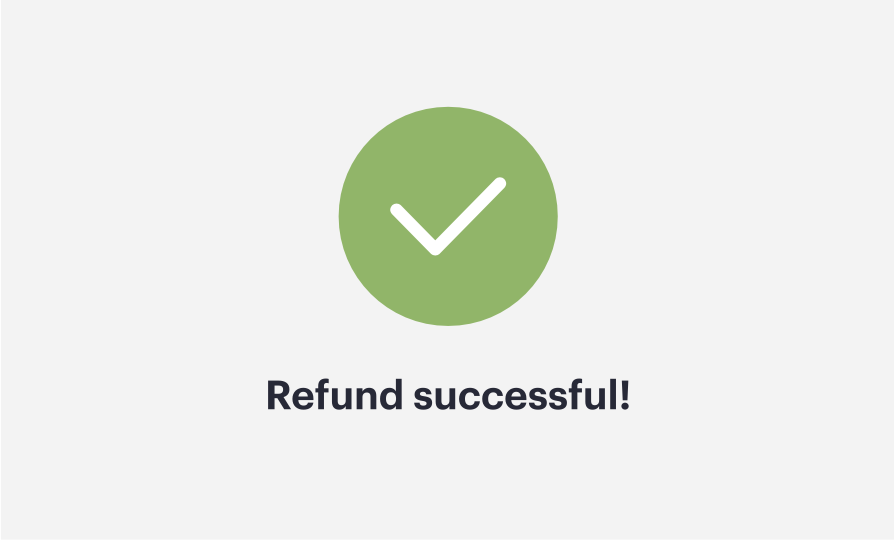
Input manager-employee PIN to finalize. The device will return green checkmark that the refund was complete
Sending Receipts from POS
-
Open the transactions list by tapping the order list icon on the bottom left corner of the Bartender application (top right corner if using HH POS)

-
Highlight the order that you'd like to send the guest a receipt for. NOTE: Only orders with a Paid or Refunded status can have a receipt sent. If the order is still in a processing status, such as New or Pending, you will have to wait for the order status to update
-
Below the order's cart review, tap the receipt button to the right
-
Input guest's email address or phone number and then press send